Sources — Add & Manage
Product Guide Library > Recruitment > Sources — Add & Manage
Create a database of sources used & responsible for sending leads/candidates.
Permissions & Restrictions
Permissions
Admins & Full Users: Can add, edit, delete & view all sources. Can import sources.
Standard Users: Can edit & view all sources. Cannot add or delete sources.
Limited & Read-Only Users: Can view all sources. Cannot add, edit, or delete sources.
All Users except Read-Only: Can add a source to a candidate record.
Term Definitions
Source: An organization or a person, who recommends a qualified provider to consider for hiring.
Lead: A person profile with a source. These profiles will show up in the leads list.
Restrictions or Pre-Requisites
A source must be created before it can be tied to a person record. A new source cannot be added at the same time a new person profile is being created — however, an existing source can be tied to a person profile when creating a new profile.
A source must be added to a person’s profile before being added to a candidate card.
A source expense can be tied to a source only after the source has been created.
Add a Source
There are two ways to add sources, either manually or through our data importer. This guide will show you how to manually add a source and briefly discuss how to bulk-add sources.
Manually Add a Source
- From the main navigation click on the Recruit tab.
- Within the drop-down options select Sources.
- Click the Add Source button.

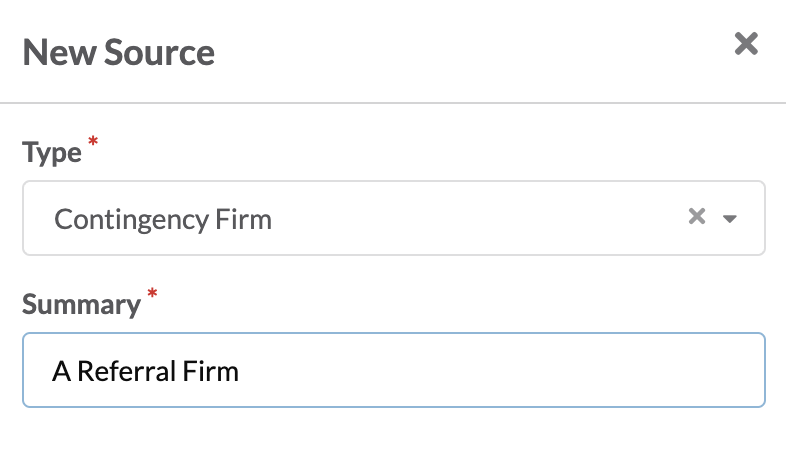
- A panel will open on the left-hand side of the screen
- Fill out the two required fields:
- Type: A pre-defined dropdown list that categorizes the source — this list cannot be customized. If no category fits the source use Other or Unknown.
- Summary: A name or title of the source.
- Click Save.
- On clicking save the source profile page will be opened.
Bulk Import Sources
Both Admins and Full users can import sources via the Date Importer. From the Account settings, click Importer.
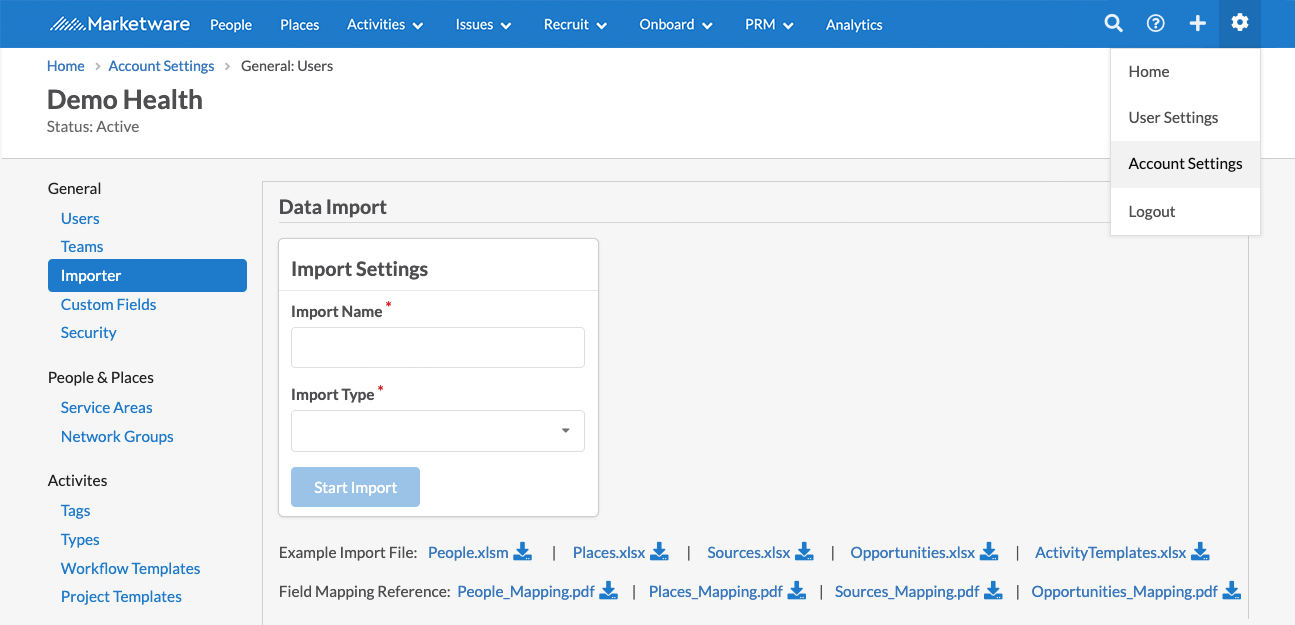
- Download the Sources mapping and Sources files. The application accepts specific fields and specific formatting so explicitly follow directions.
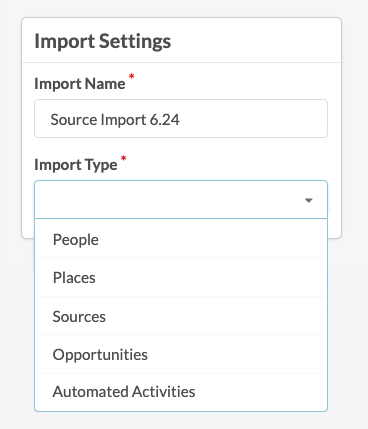
- Once the Excel file is filled out, name the import, select sources from the import type, and click start import.
- Confirm the field mappings and review that the data looks correct and click import.
Navigate a Source Profile
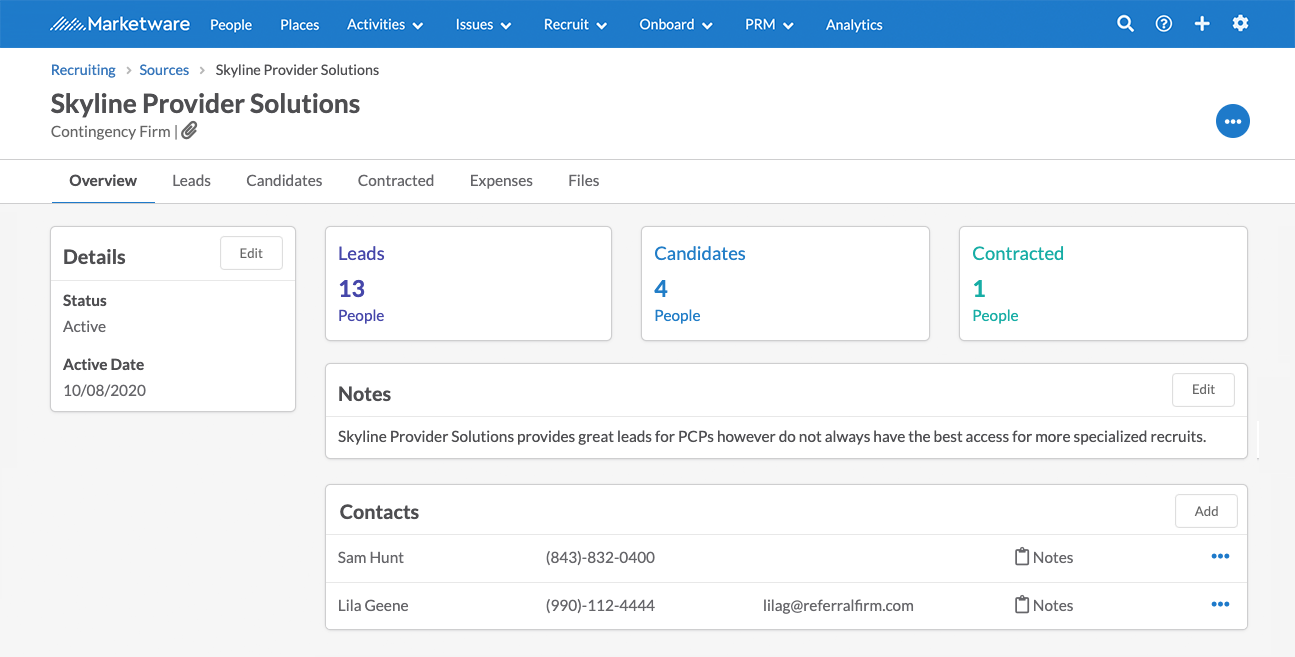
Header
- The header displays the source name and type.
- Edit the name or the type by clicking the ellipses on the right-hand side.
- Sources can only be deleted if there are no expenses.

Overview
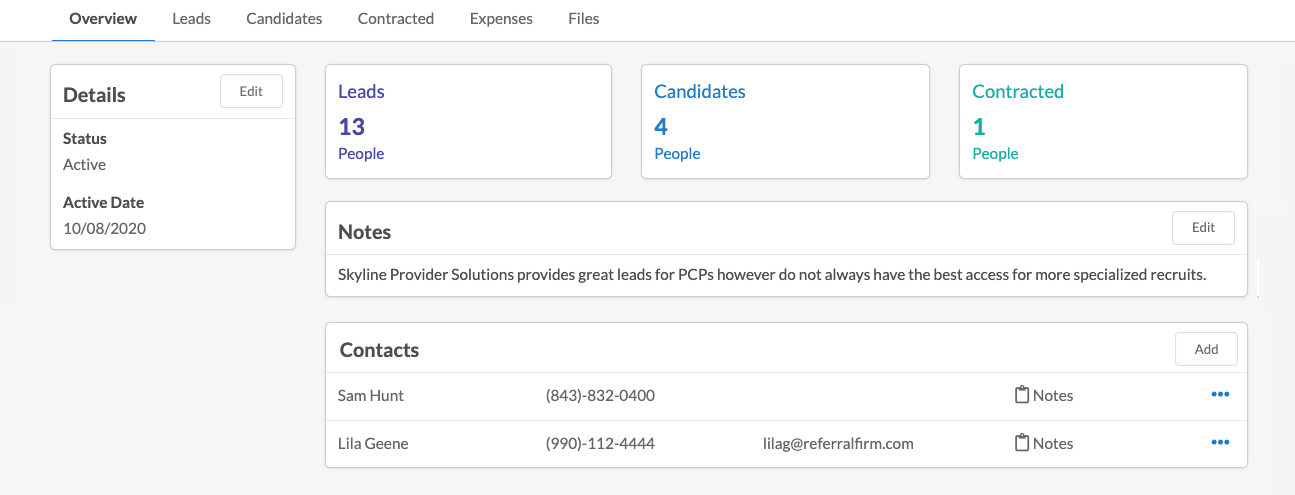
The overview page contains all the information about a source including contacts and relative notes.
Source Details: When creating a new source, by default it will be active and have an active date based on the created date. Sources can be made inactive if no longer in use but can still be applied to candidates. Categorizing sources by active and inactive can help with reporting.
Notes: Use notes to add important correspondence with the source or any other relevant details about using the source for leads or candidates.
Roll-Up Cards: The roll-up cards on the overview page give high-level reporting numbers on how many leads, candidates, and contracted candidates are tied to this source. Note that these cards do not have any clickable actions. Use the list options to delve deeper into the providers tied to each category.
Contacts: Add contacts to easily access phone numbers or emails of the people who send you referrals.
Leads
The Leads Tab includes your leads list that identifies all provider profiles tied to this source. This will overlap with the candidates and contracted lists as it is all person profiles.
Actions for this list include exporting & assigning a practice manager.
Top tip: This list can be a great tool to pull qualified candidates into a practice opportunity.

Candidates
The candidates list provides information on how many providers are in practice opportunities who have this source. Further in this guide will explain how to tie a source to a candidate.
Actions for this list include export, assign practice manager & removing this source on the candidate card itself.

Contracted
The contracted list provides information on how many candidates with this source were contracted for an opportunity. This list can help to identify if this source provides enough qualified candidates that go on to get hired. This list will overlap with the candidate list. Actions from this list are to export.

Expenses
The expenses list shows all expenses accrued for this source. Actions on this list are to export.
Learn how to add & manage source expenses →

Files
Add important and relevant files related to the source. Restrict access to files for high-security files.

Add Sources to a Person Profile
Sources can be added to a person profile on the creation of a new profile or from the profile page itself.
Be Aware: The source has to be created 1st before it is available to add to a person.
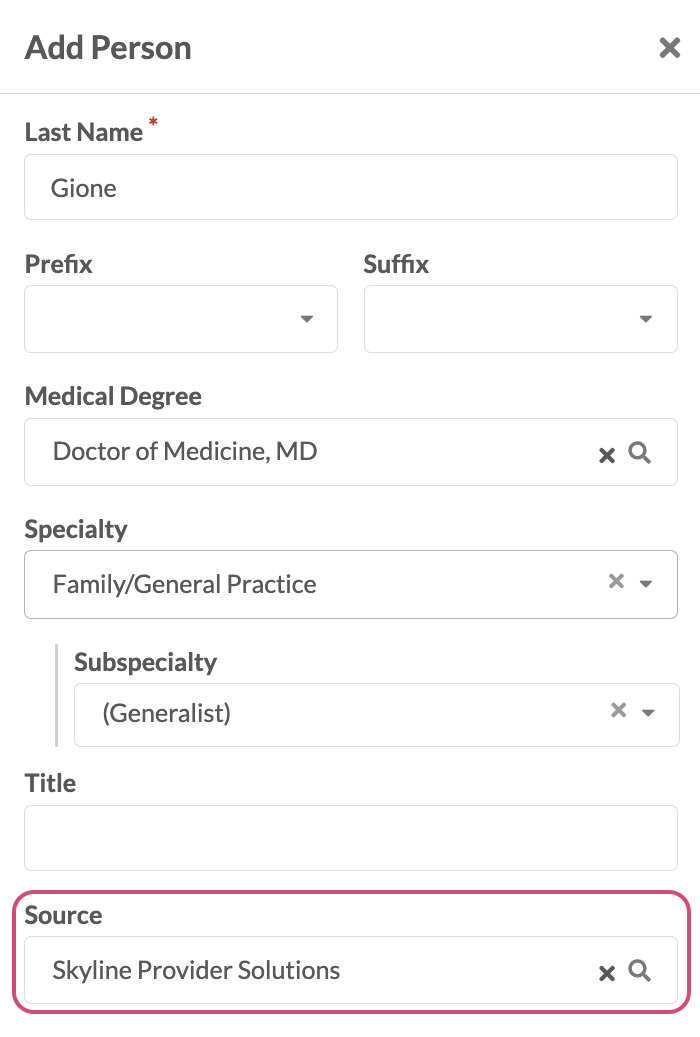
Add Source from the Add Person Form
When adding a new person manually from the + button, the source will become an available field based on 2 factors:
- The person type is physician, advanced practice provider (APP), allied health professional, or staff.
- User access is Recruit — source is a recruit-only field.
Add Source to the Person Profile Page
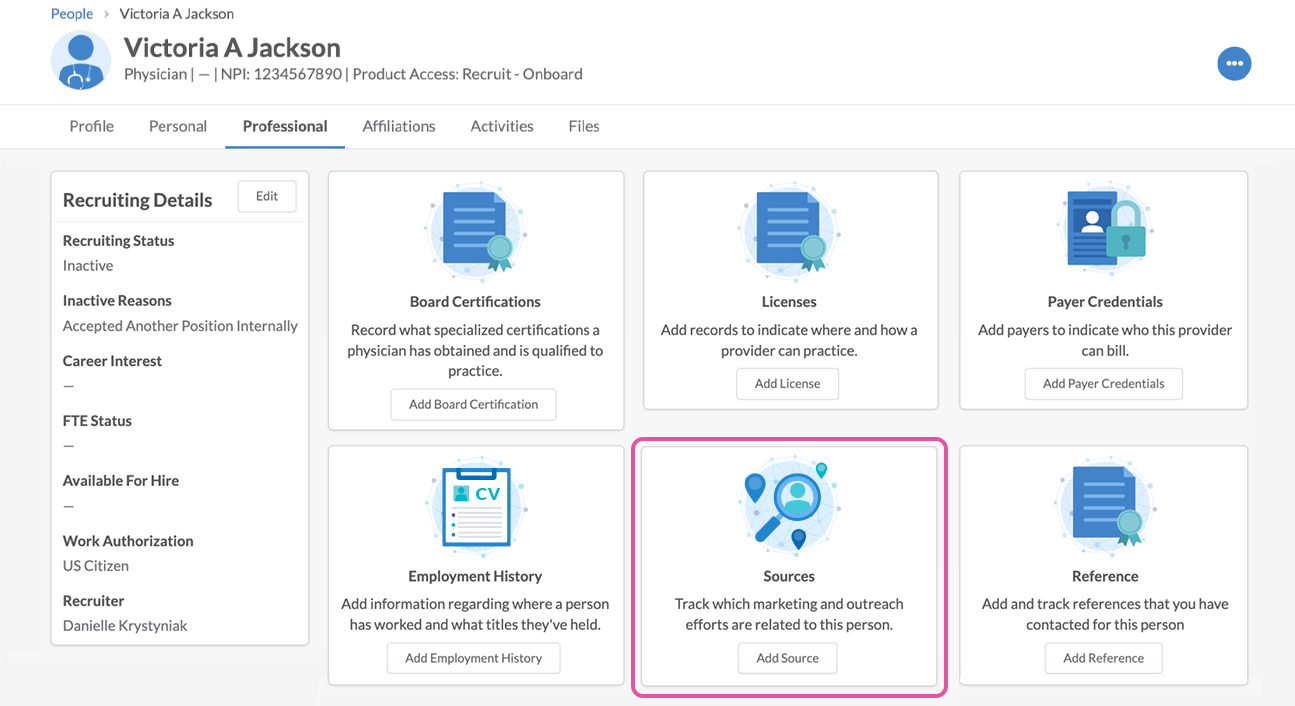
- From the person profile select the professional page.
- If no sources have been added, the source card will be on the second row of professional cards.
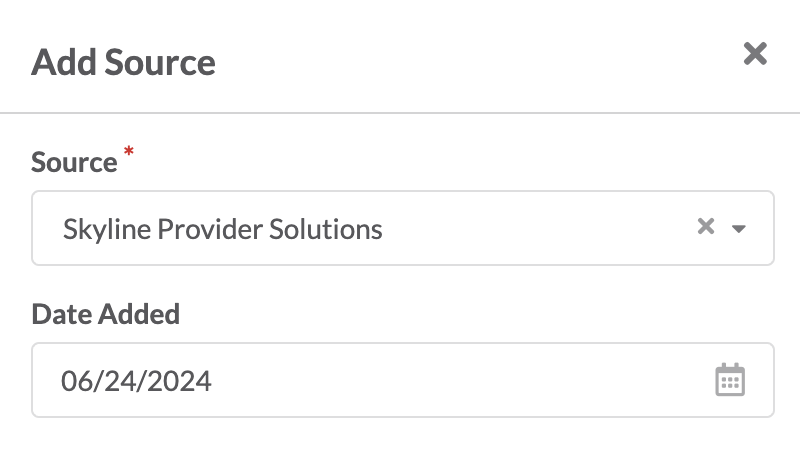
- Click Add Source and then the Add Source form will slide out.
- Input the source from the drop-down and include the date this source provided the referral — note that it defaults to today’s date but can be changed.

Edit & Remove a Source from a Profile
Both editing and removing a source can be done from the ellipses on the line item for the source.
Edit allows you to pick a new source entirely as well as input a new date added.
If the source is tied to candidates and a new source is picked, this source will be removed from that candidate card as the selection.
Similarly, if the source is removed from the person profile it will be removed from their respective candidate card.

Add Sources to a Candidate
Sources can be tied to a candidate card to indicate which source should receive credit for the referral.
By default, if a person has 1 source tied to their profile, this source will be automatically tied to their candidate card on being added to a practice opportunity.
Additionally, if no source is tied to a profile and they are added as a candidate to a practice opportunity, adding a single source will also auto-update on the candidate card itself as the default source.
If a person was referred by more than one source or a secondary source is added to a candidate later and needs to be updated, the source can be chosen manually for the candidate.
Note: If a candidate is being tracked in different opportunities for different roles, it is possible to tie a different source to each card
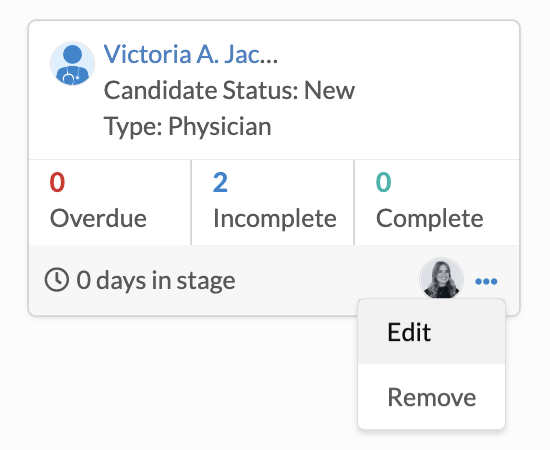
- From within the practice opportunity or candidate list click the ellipses to view or edit the candidate.
- If viewing the details card, click edit.
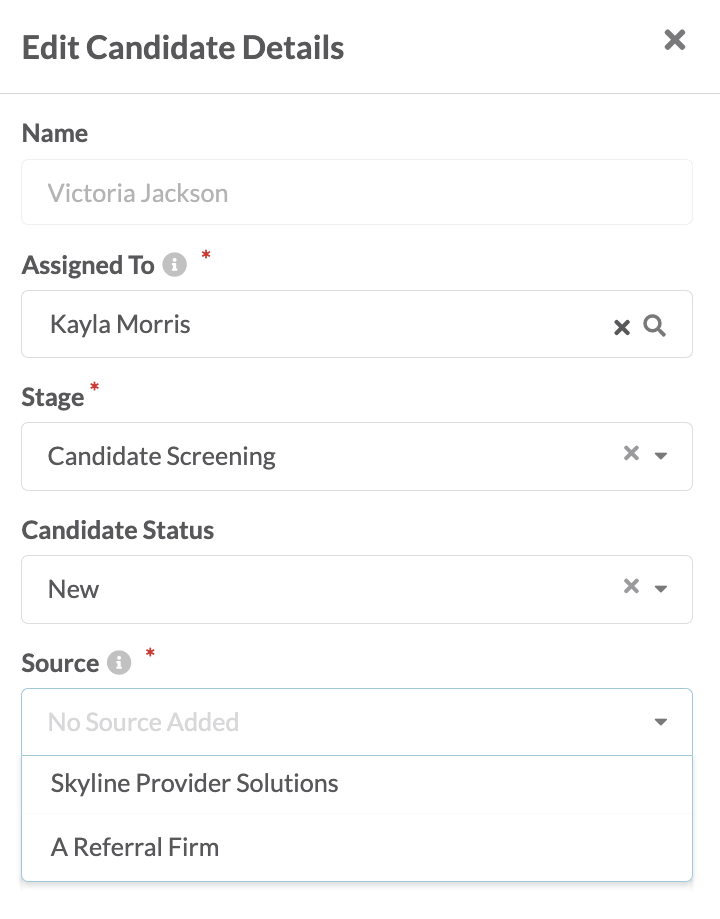
- From the edit panel click the dropdown for the source to tie to the candidate.
- If there is only 1 source the dropdown will not open.
- If a new source needs to be tied but is not in the dropdown, it must be added to the person profile before it is available to choose on the candidate card.
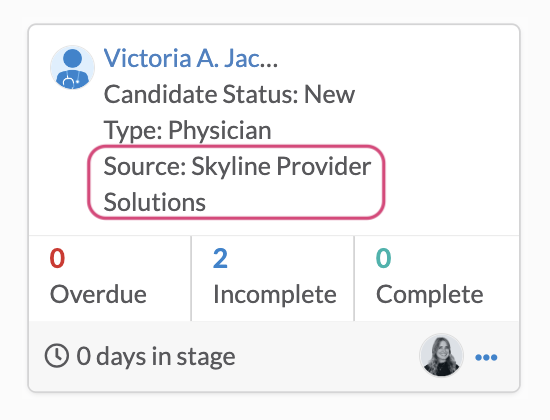
- Click save and the source will display both on the candidate card thumbnail & details panel as well as be available on the candidate list.
Sources Dashboards
Dive deep into granular reporting through our sourcing dashboards.
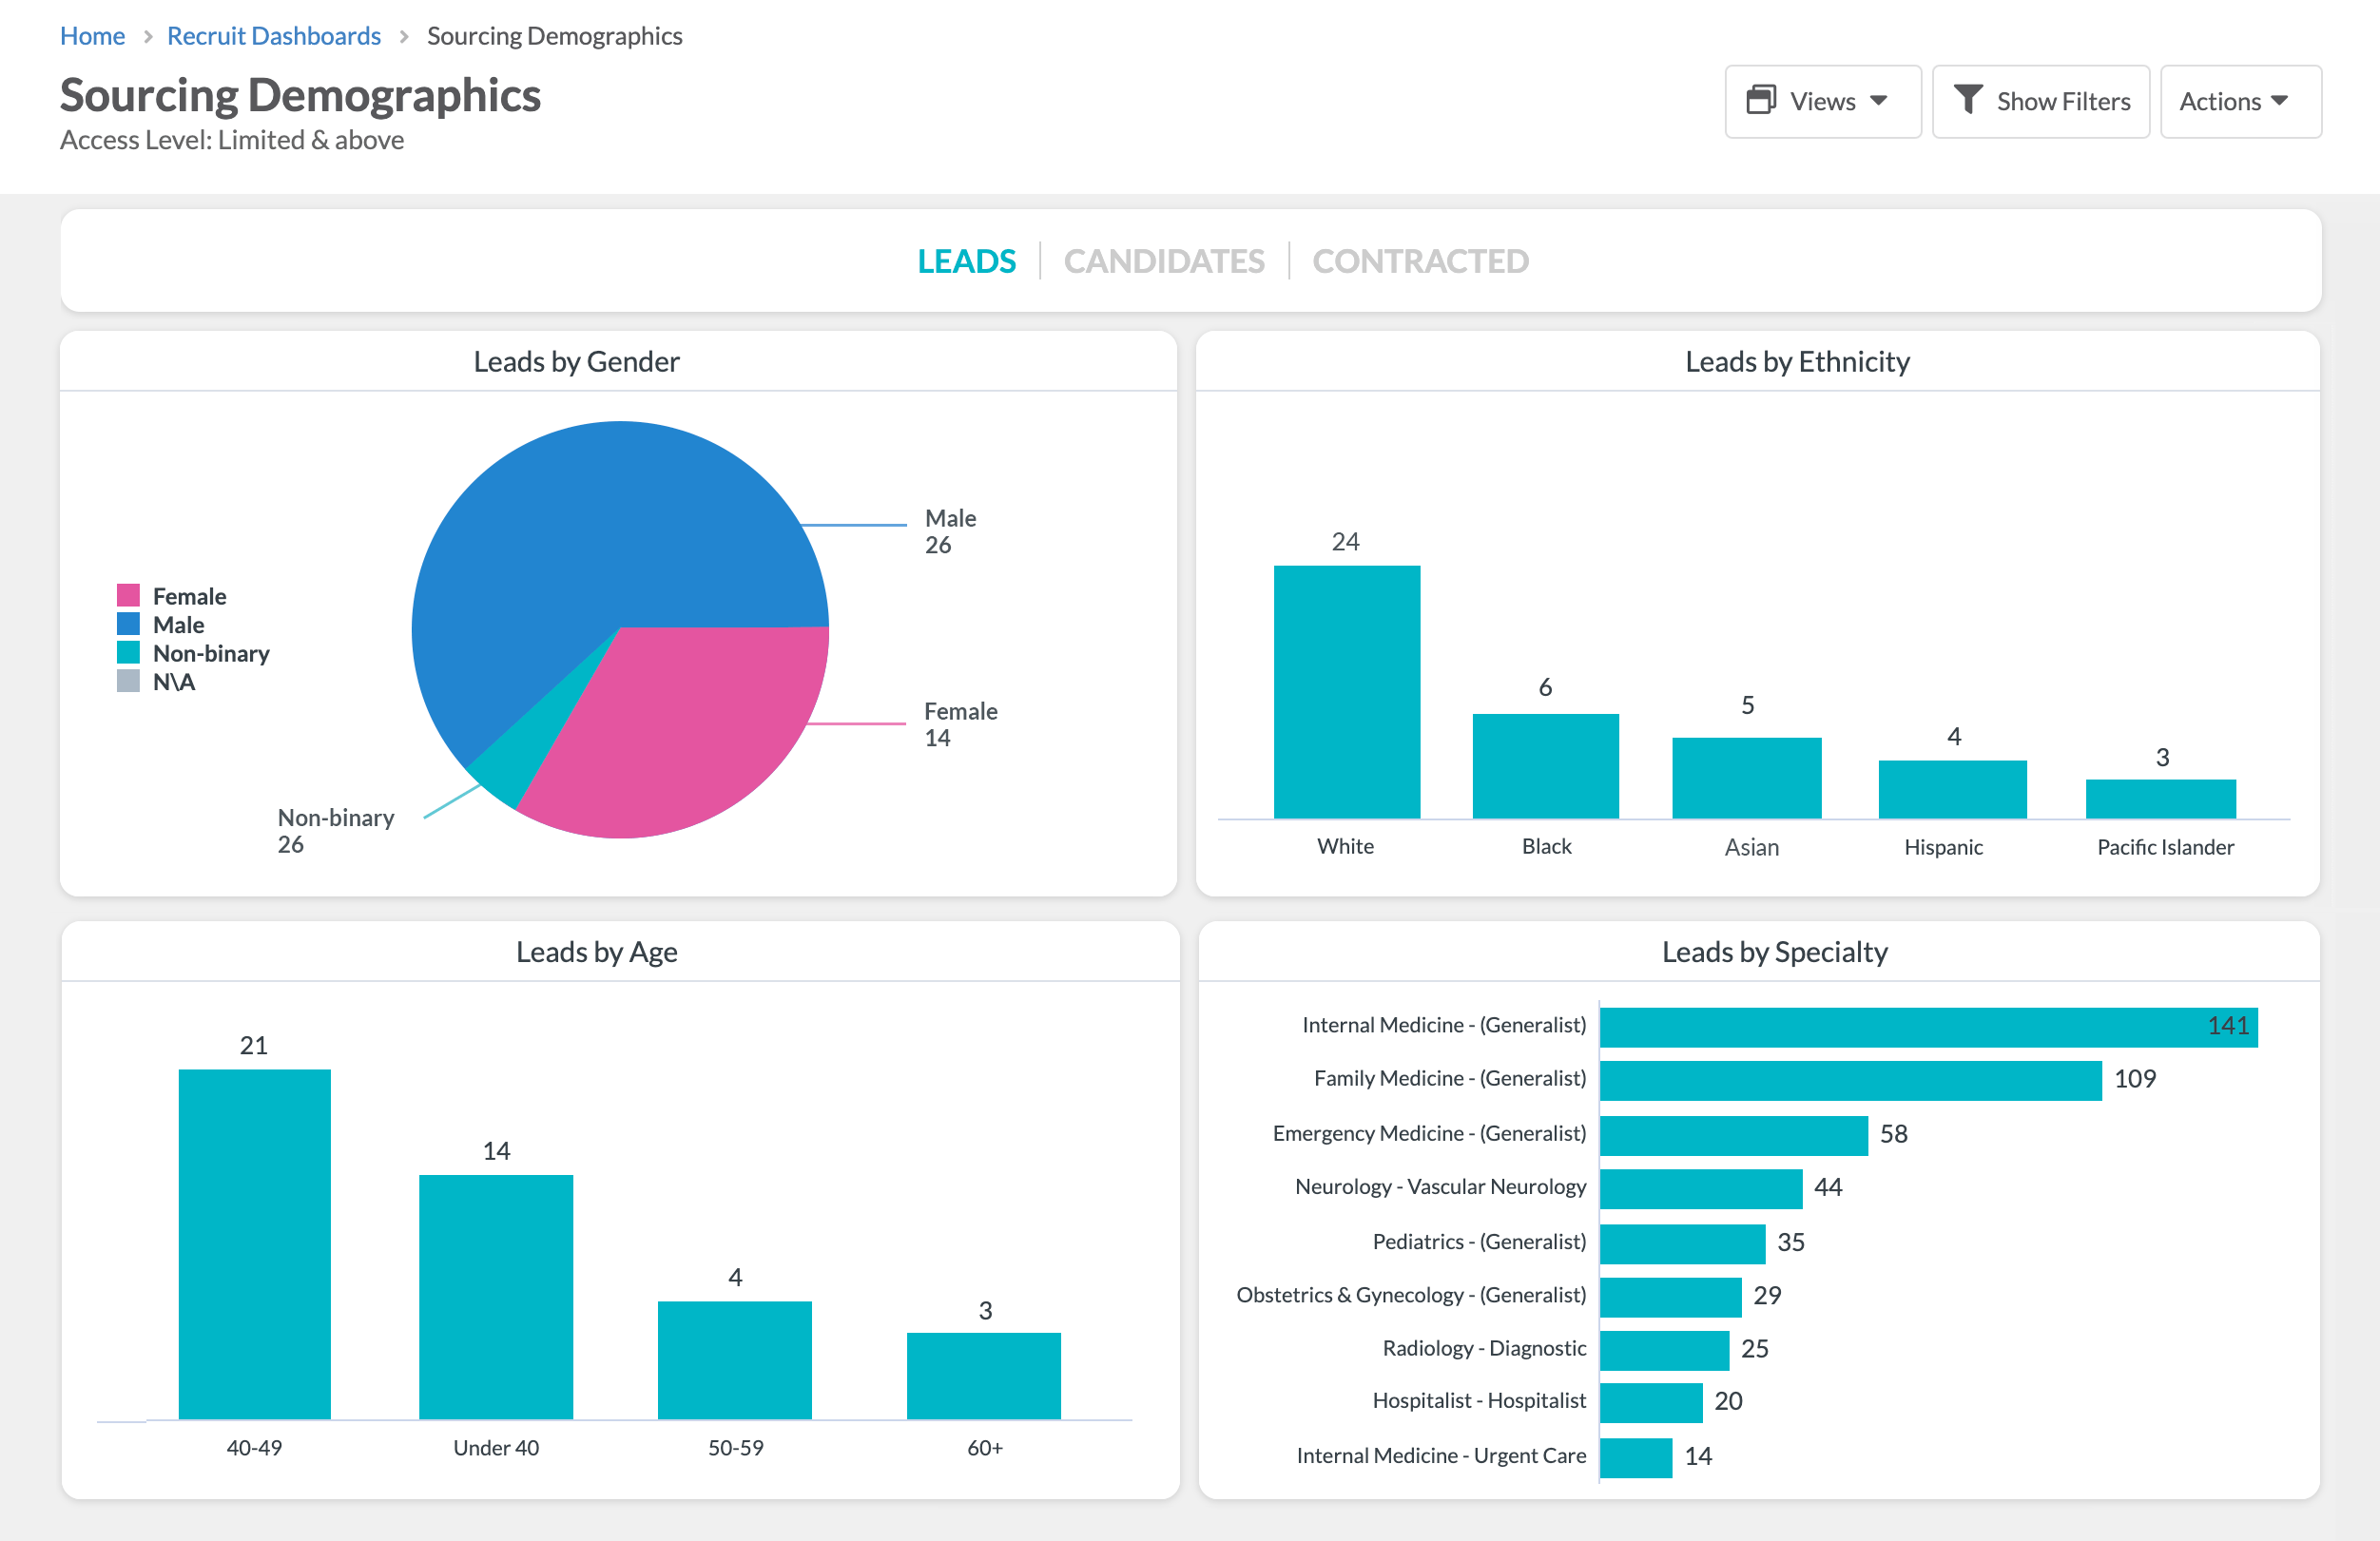
Sourcing Demographics
Understand the breakdown of demographic data like gender, ethnicity, age, and specialty
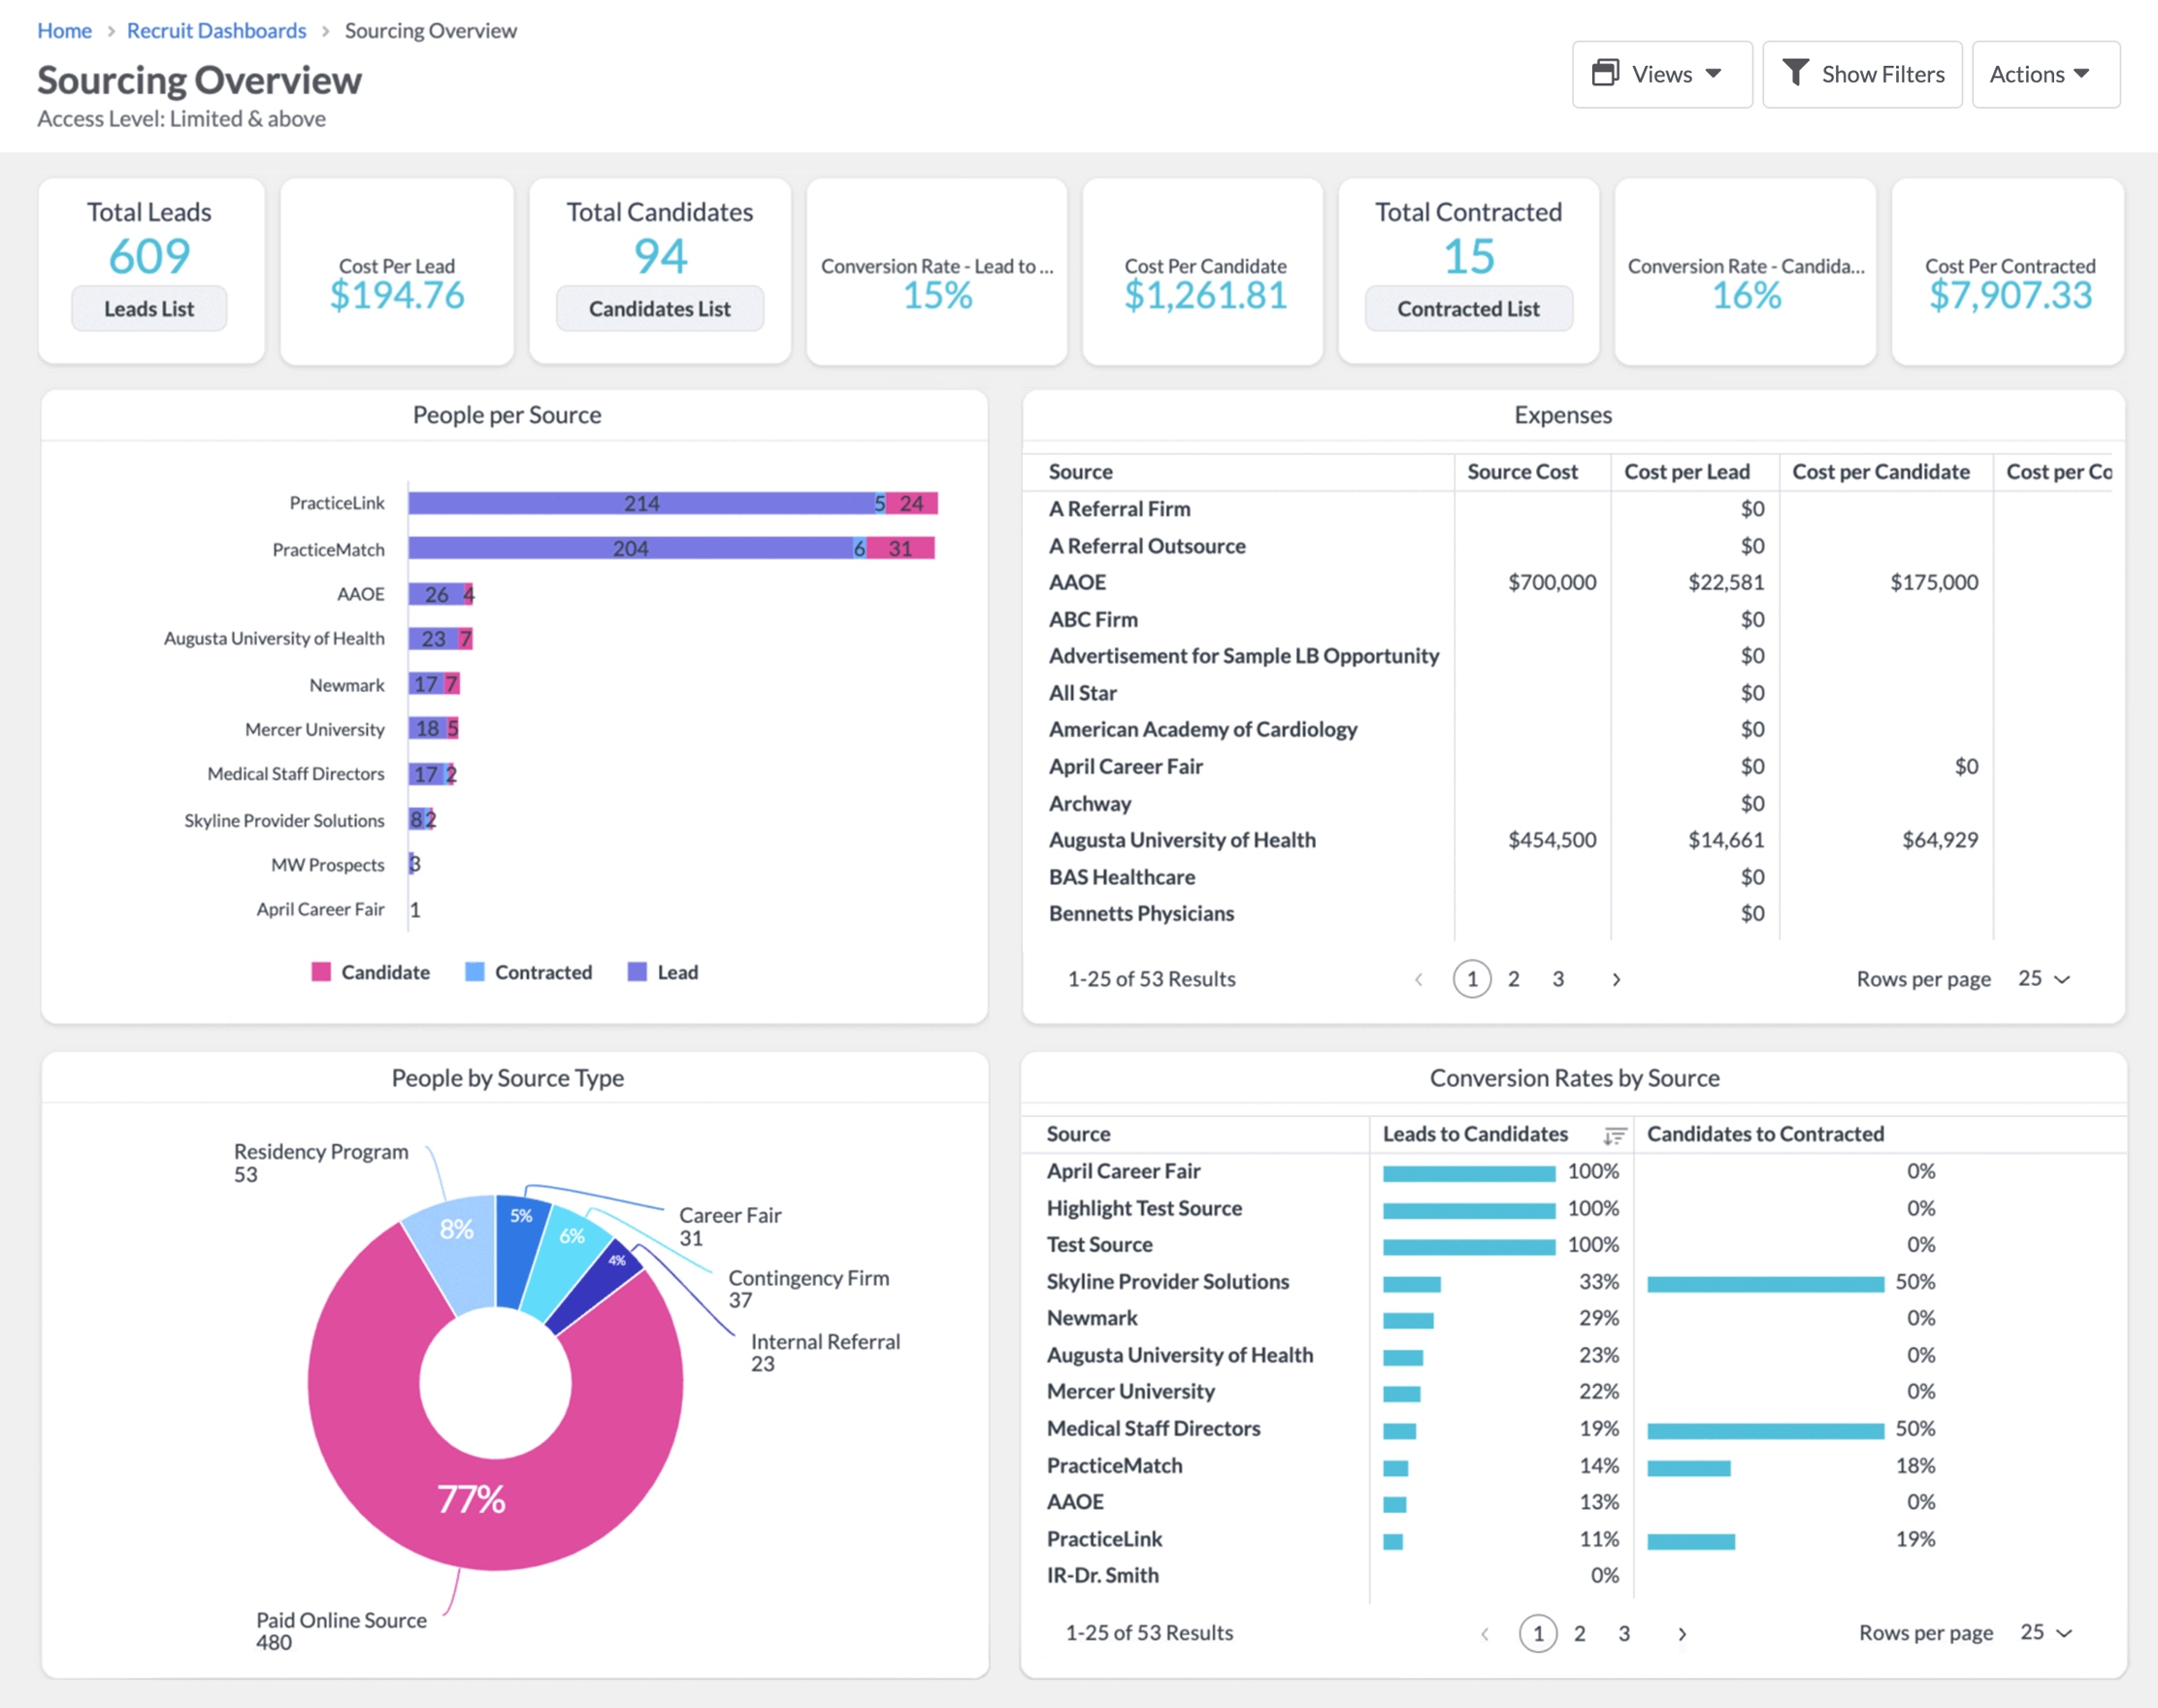
Sourcing Overview
Gain insight into the most valuable sources referring to the highest percentage of leads that go on to get contracted, overall conversion rates (leads to candidates & candidates who are contracted) as well as cost breakdowns for sources.
Use this dashboard to isolate which sources may be underperforming to help with partnership discussions.
