Issues
Product Guide Library > PRM > Issues
Track problems or processes that can be improved on by using Issues.
Permissions & Restrictions
Permissions
Admins: Can add view, edit, and delete all issues.
Full Users: Can add issues and view and edit all issues. Can delete their issues or their teams issues.
Standard Users: Can add issues and view all issues. Can edit and delete their issues.
Limited Users: Can add issues and view their own and their teams issues. Can edit and delete their issues.
Read-Only: Users can view all issues. Cannot add or manage issues.
Term Definitions
Issues: A problem that needs to be addressed or solved by the person or persons assigned to the issue.
Departments: A custom list of departments in the organization that an issue might be connected to.
Categories: A custom list to define and group issues.
Sources: A custom list to identify how the issue was made known.
Restrictions or Pre-Requisites
Keep in mind which fields are required on a create issue form vs not.
Departments: Not Required
Categories: Required
Sources: Not Required
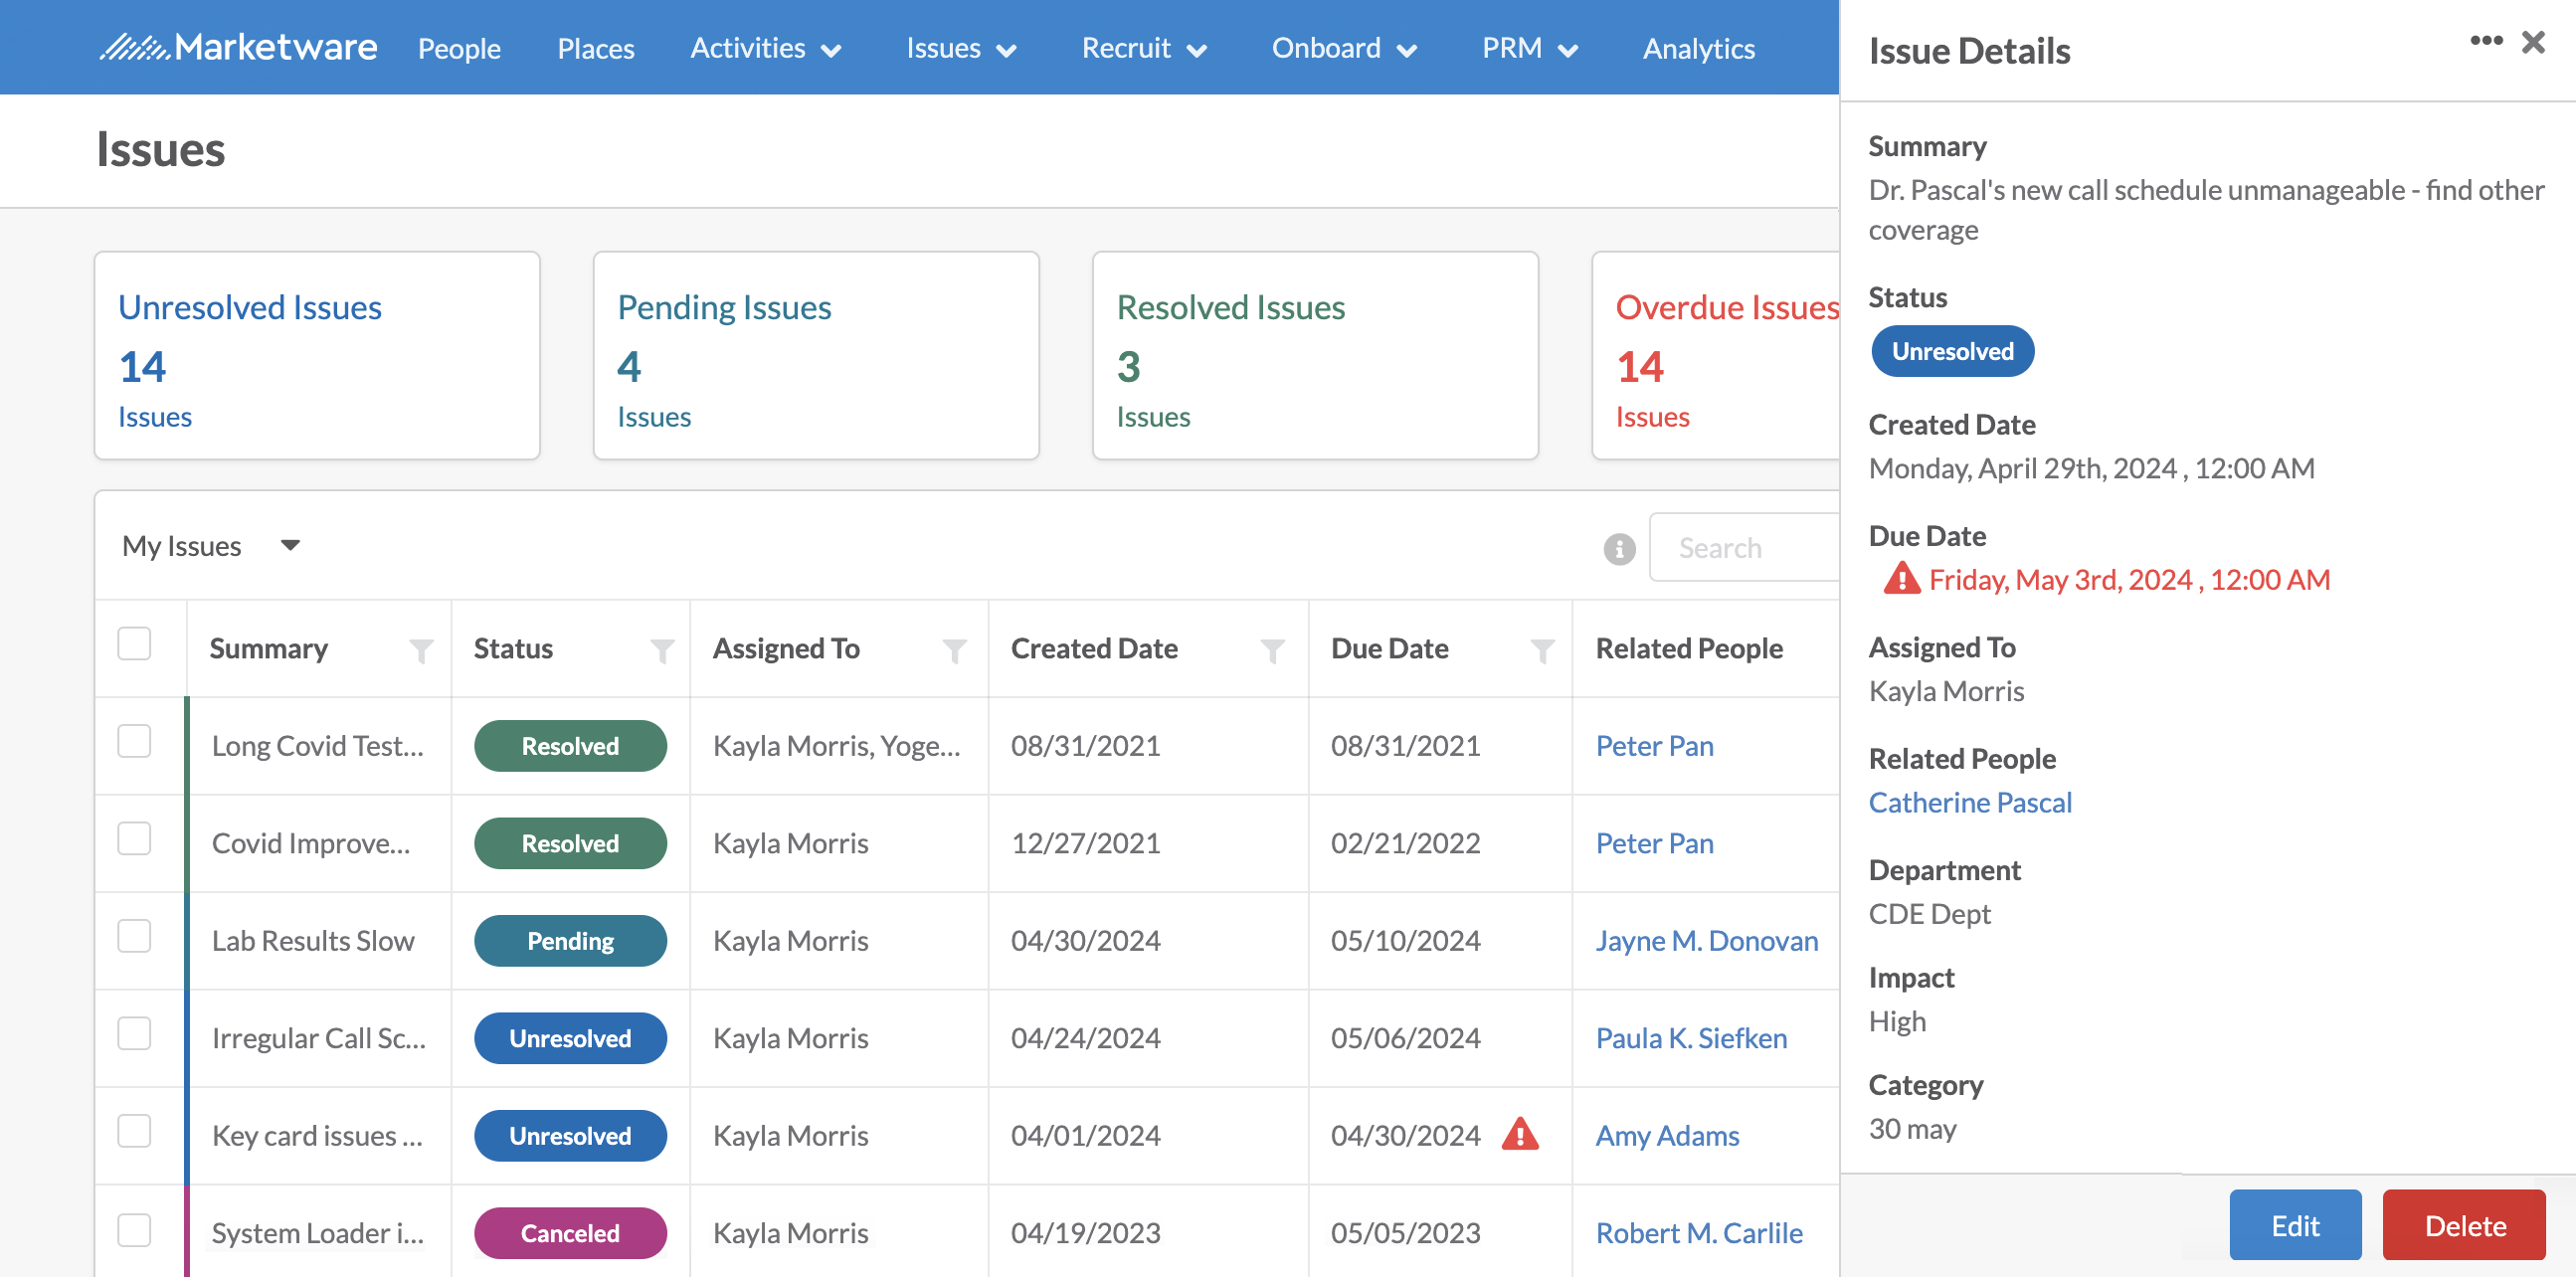
Issues List View Page
All issues can be viewed from Issues, which can be accessed from Issue > List View in the navigation bar.
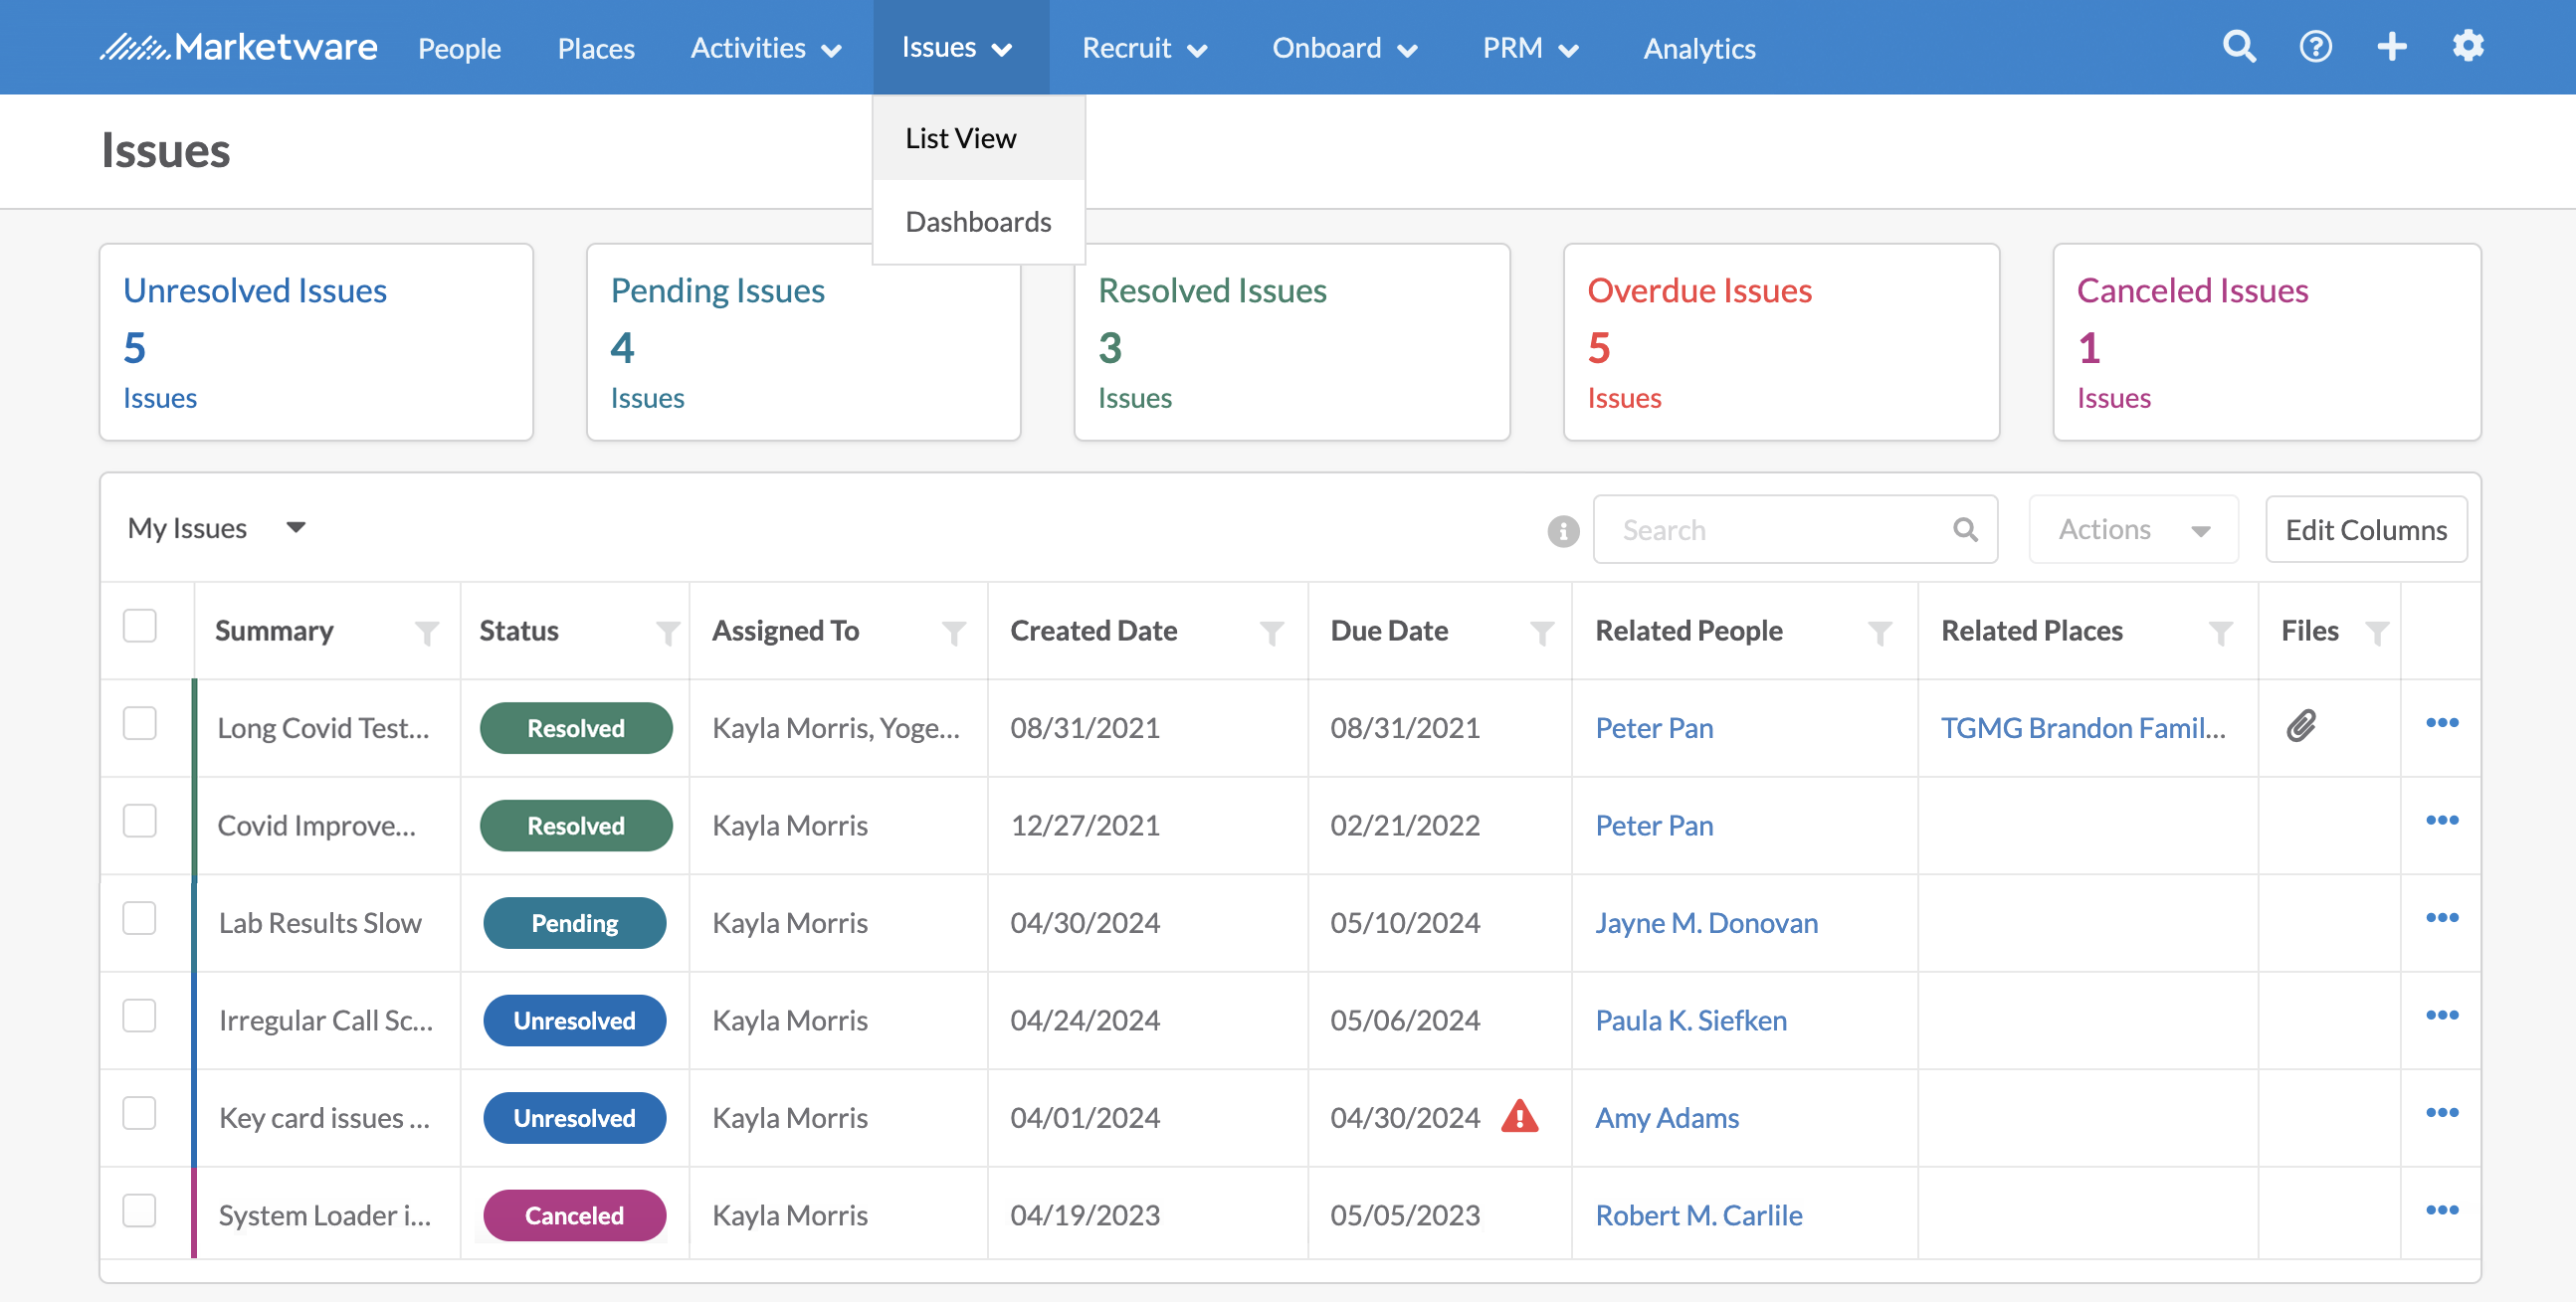
Issues Cards
Issue cards at the top include a roll-up count of each particular card and these cards can be clicked on to filter the list below. Issue statuses have corresponding colors:
Unresolved Issues: Blue
Pending Issues: Teal
Resolved Issues: Green
Canceled Issues: Magenta
Issues List Views
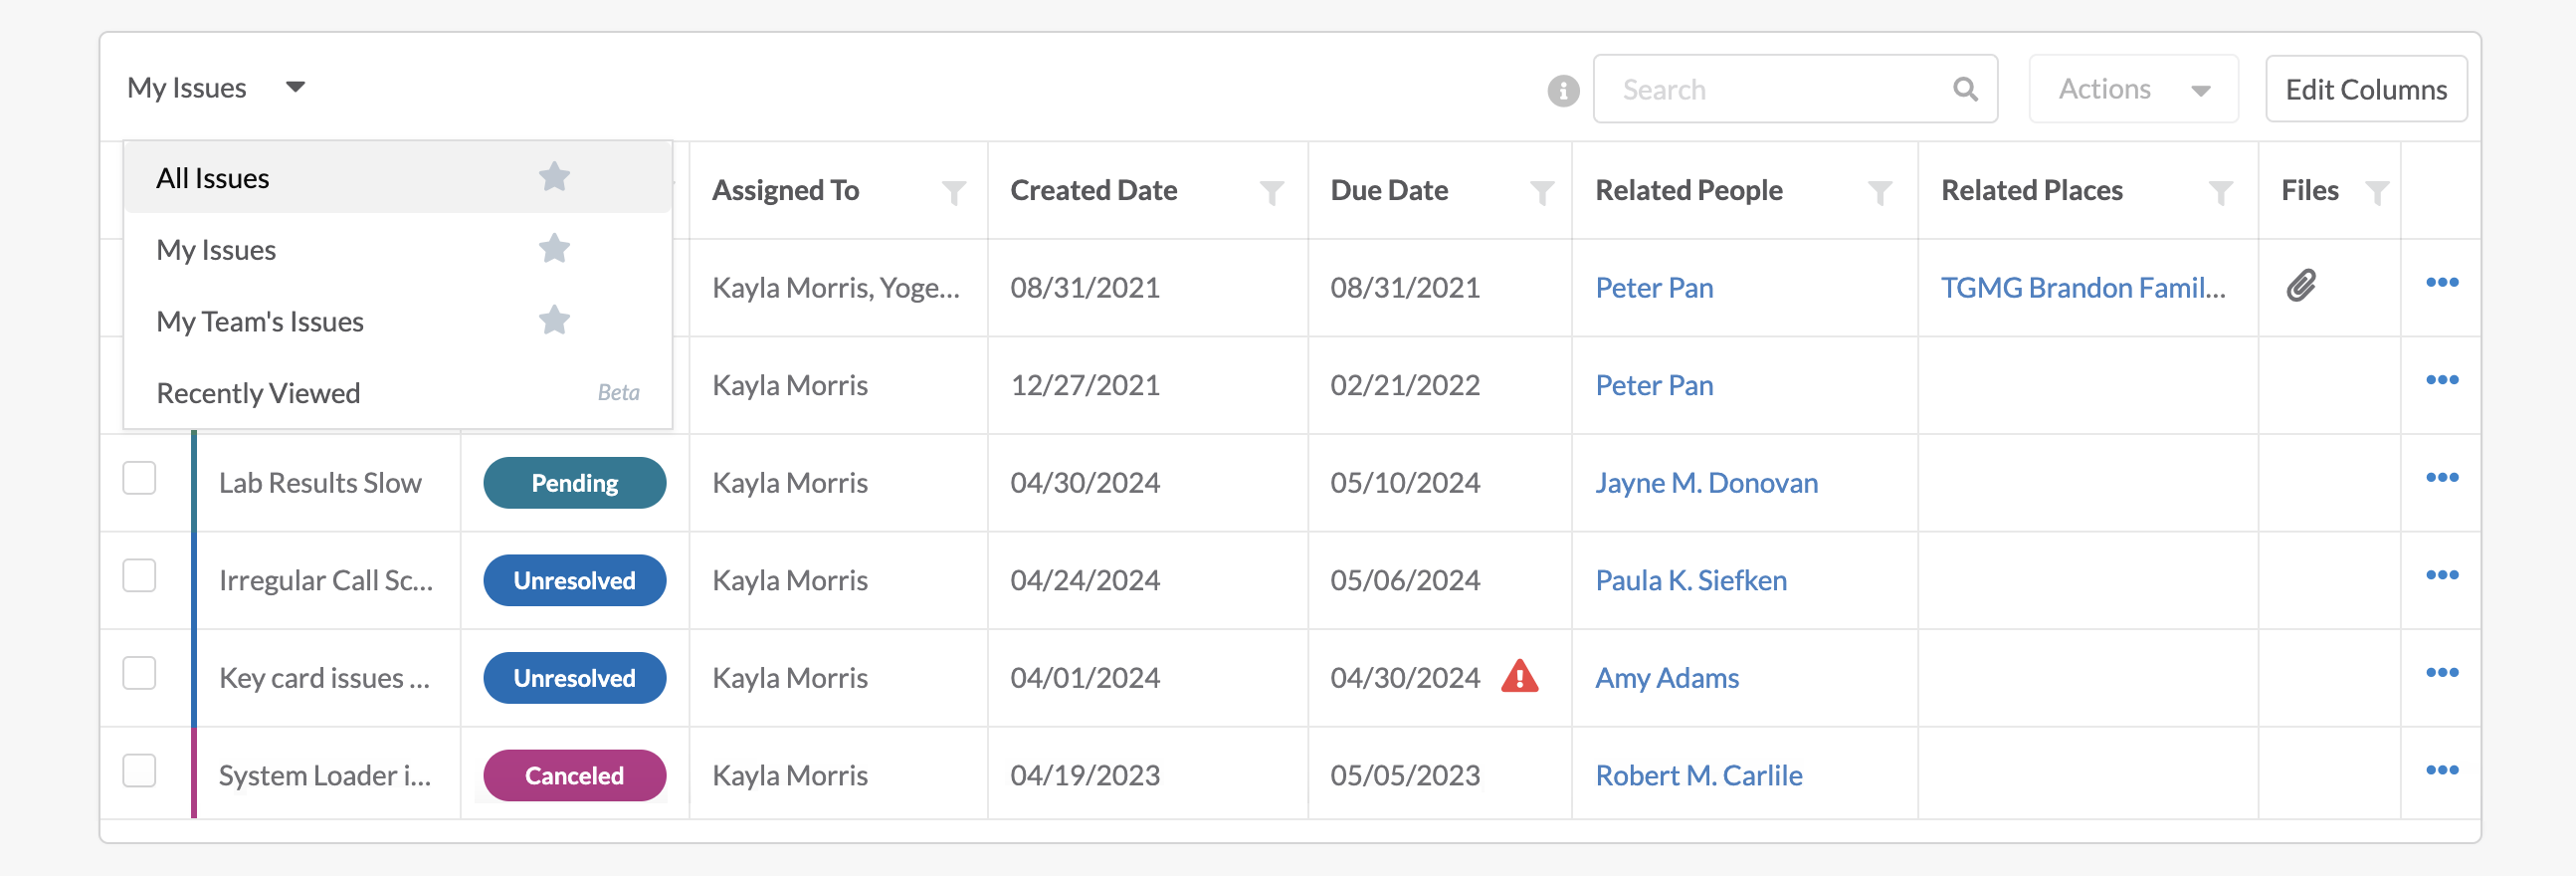
The issues list will default to the quick list of ‘My Issues’ and will show a list of all issues assigned to the logged-in user. Users can switch to All Issues or My Teams issues from the quick list dropdown. Start by selecting which view you would like to see.
All Issues: Issues across the entire organization.
My Issues: Issues that you are assigned — default view.
My Team’s Issues: Issues that are assigned to your team.
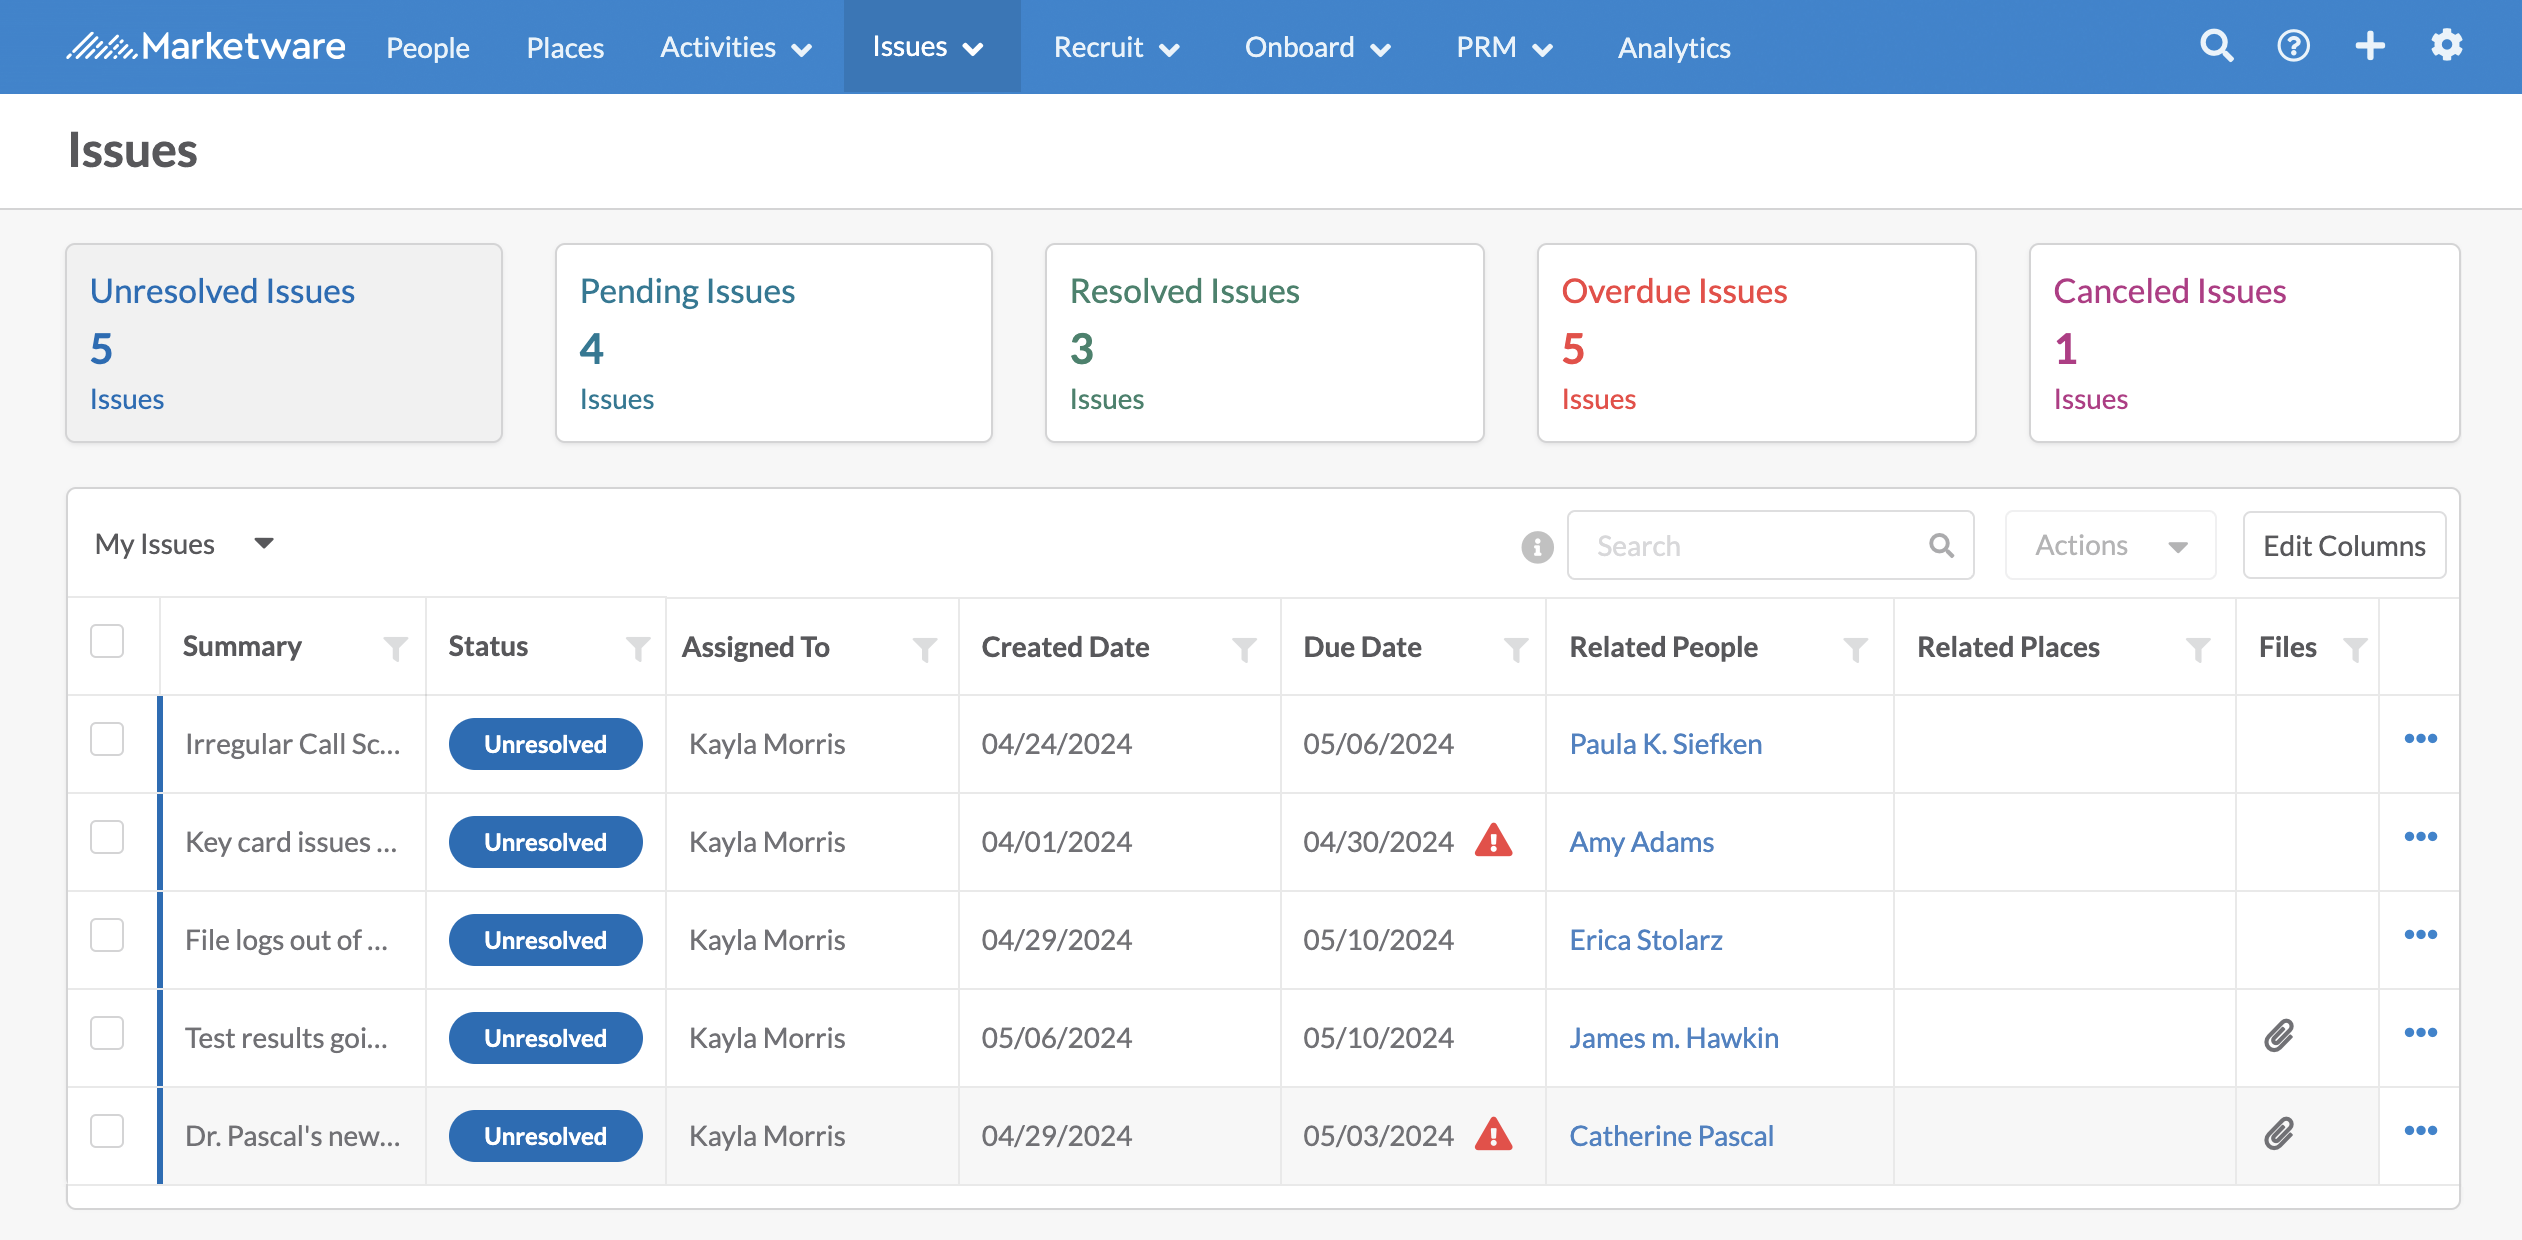
Overdue Issues
Overdue issues have an exclamation icon in red next to the date and when viewing the issue details panel, the due date will have the overdue icon and be in red text. Both Pending and Unresolved issues can be indicated as overdue.
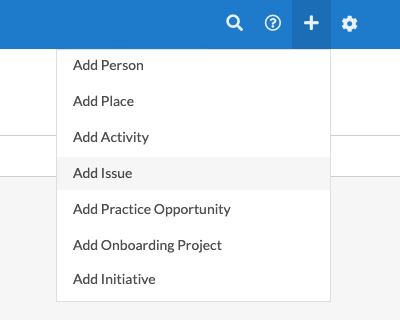
Add New Issue
- Click the + drop-down menu in the top right
- Click Add Issue
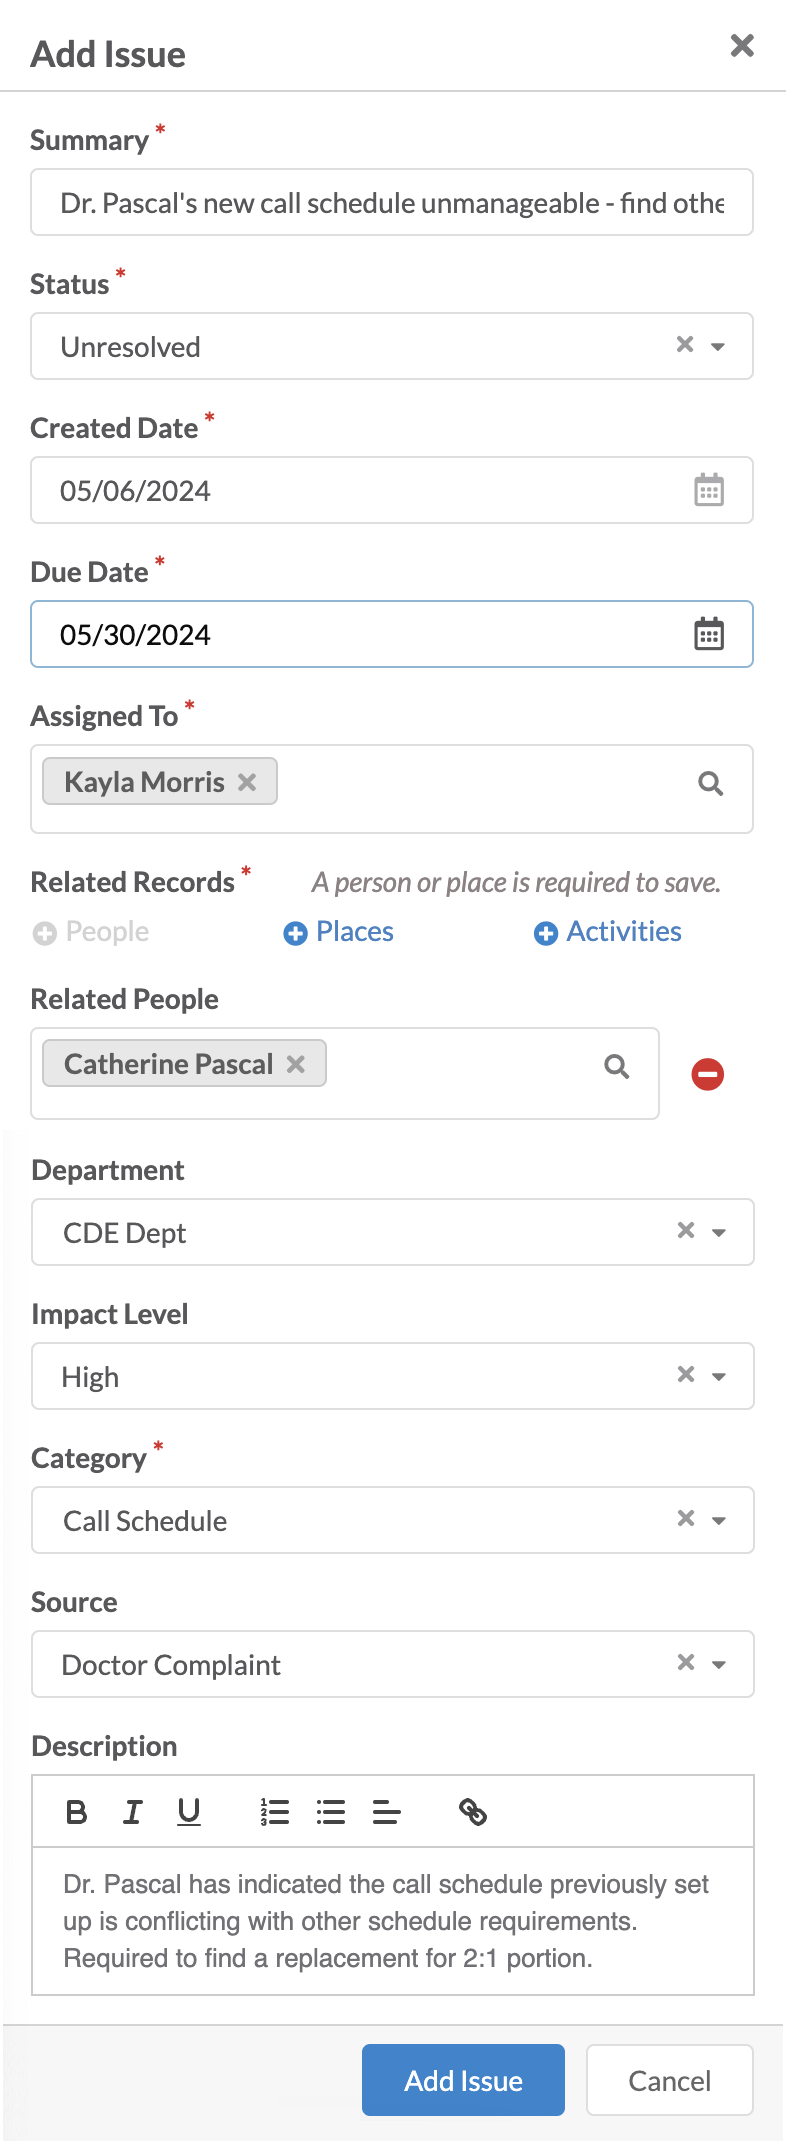
- Add Issue form will slide out
- Enter required & optional information in the fields available (required fields are indicated with a red asterisk)
- Click Add Issue button
Add Issue Form Fields
Summary: Brief indication of the issue. More detailed information can be entered in the issue description.
Status: Indicates where the issue is in the resolution cycle.
- Unresolved: no action has been completed on this issue
- Resolved: this issue has been identified and taken care of
- Pending: this issue has been identified and is waiting on some action before it can be resolved
- Canceled: this issue was identified but is no longer a problem
Created Date: Date the issue was identified.
Due Date: The date the issue needs to be resolved by.
Assigned To: User or users that are responsible for this issue.
Anyone assigned to an issue will receive notifications when the issue is created and when updates are made to the issue
Related Records: Associating a related person is required for each issue. Additional related records can include places and activities.
Note: A person or a place record is required to save the issue. This is an either or requirement.
Department: Select which department this issue relates to. This field can be customized in account settings.
Impact Level: Indicate how serious the issue is. Options are Low, Medium, High, and Information Only.
Category: Select what the nature of this issue is. This field can be customized in account settings.
Source: Select what medium this issue was discovered through. This field can be customized in account settings.
Description: Use this field to describe in detail anything important to this issue.
Edit an Issue
An issue can be opened by clicking the issue line item. You can also select view details or edit from the ellipses to the right of the issue line item.
From the issue details, click the blue Edit button. All fields are editable and once edited, click save to record changes.
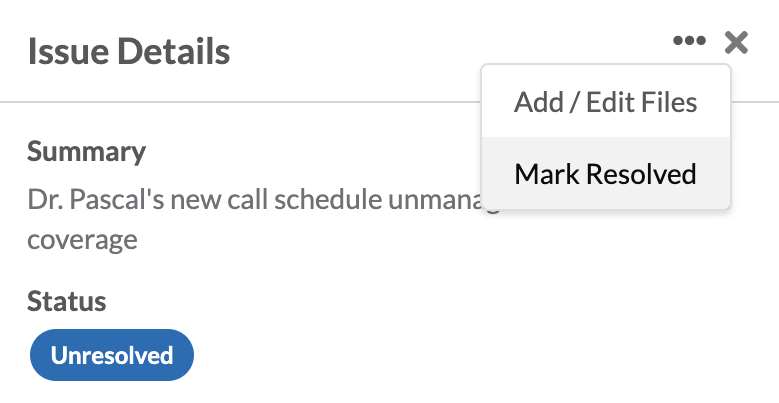
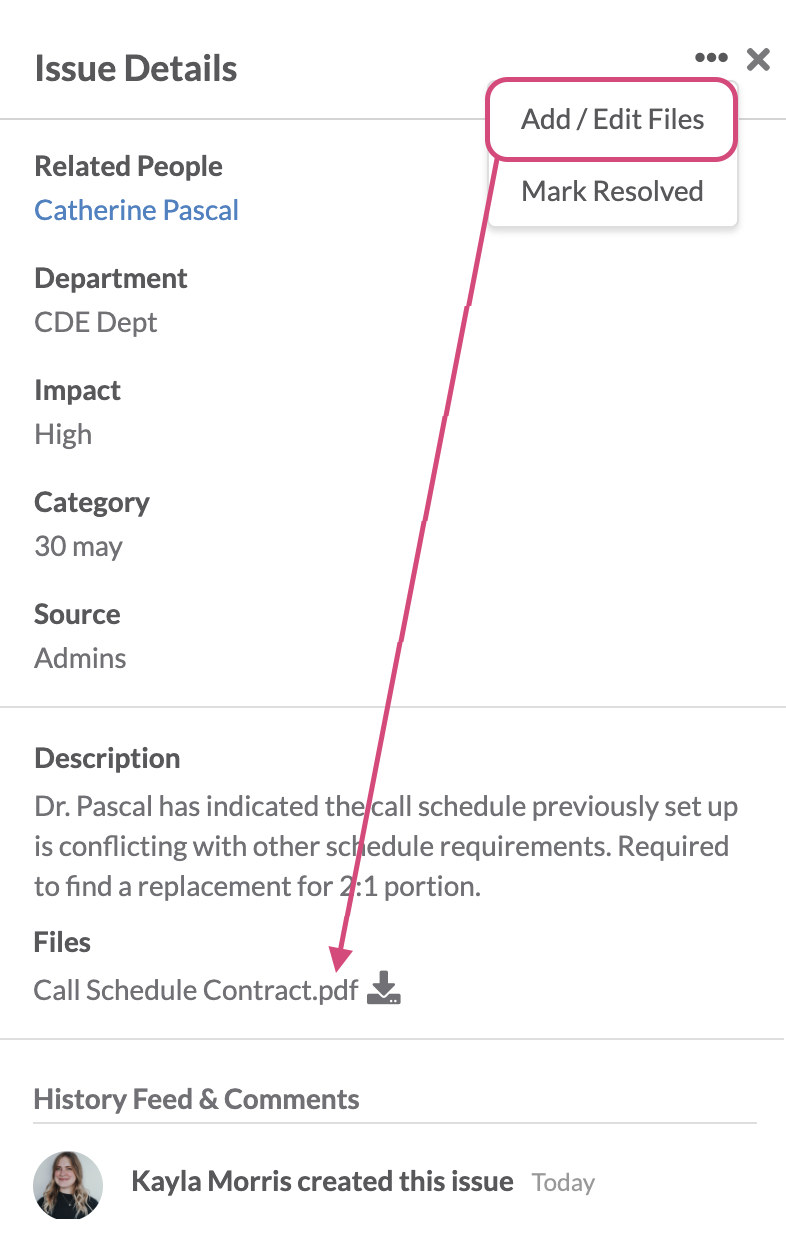
Issues can be quickly marked as Resolved by selecting the 3-dot ellipses in the top right corner of the issue slide-out.
History Feed & Comments
The history feed will capture and represent edits that have been made to an issue for reference. The history feed will capture a date & time stamp as well as the user who made the change. Edits captured include:
- Issue created date
- Status change
- Due Date change
- Assigned to change
Comments can be used to notate needs for the issue or updates not captured in the issue form. Users can also be tagged when action or an update is needed to be informed upon — tagged users will receive an email mentioning them in the issue comment.
Review the history feed and comments guide for more in-depth information about these features.
Add Files to an Issue
Files can be added to an issue when more information is needed to track the details or resolution of an issue.
From the issue details panel, click the ellipses at the top right corner and click add/edit files.
A file panel will open and files can be added. Files will show on the details panel and can be downloaded from here or the add/edit files panel.
To restrict access on a file reference the files guide.
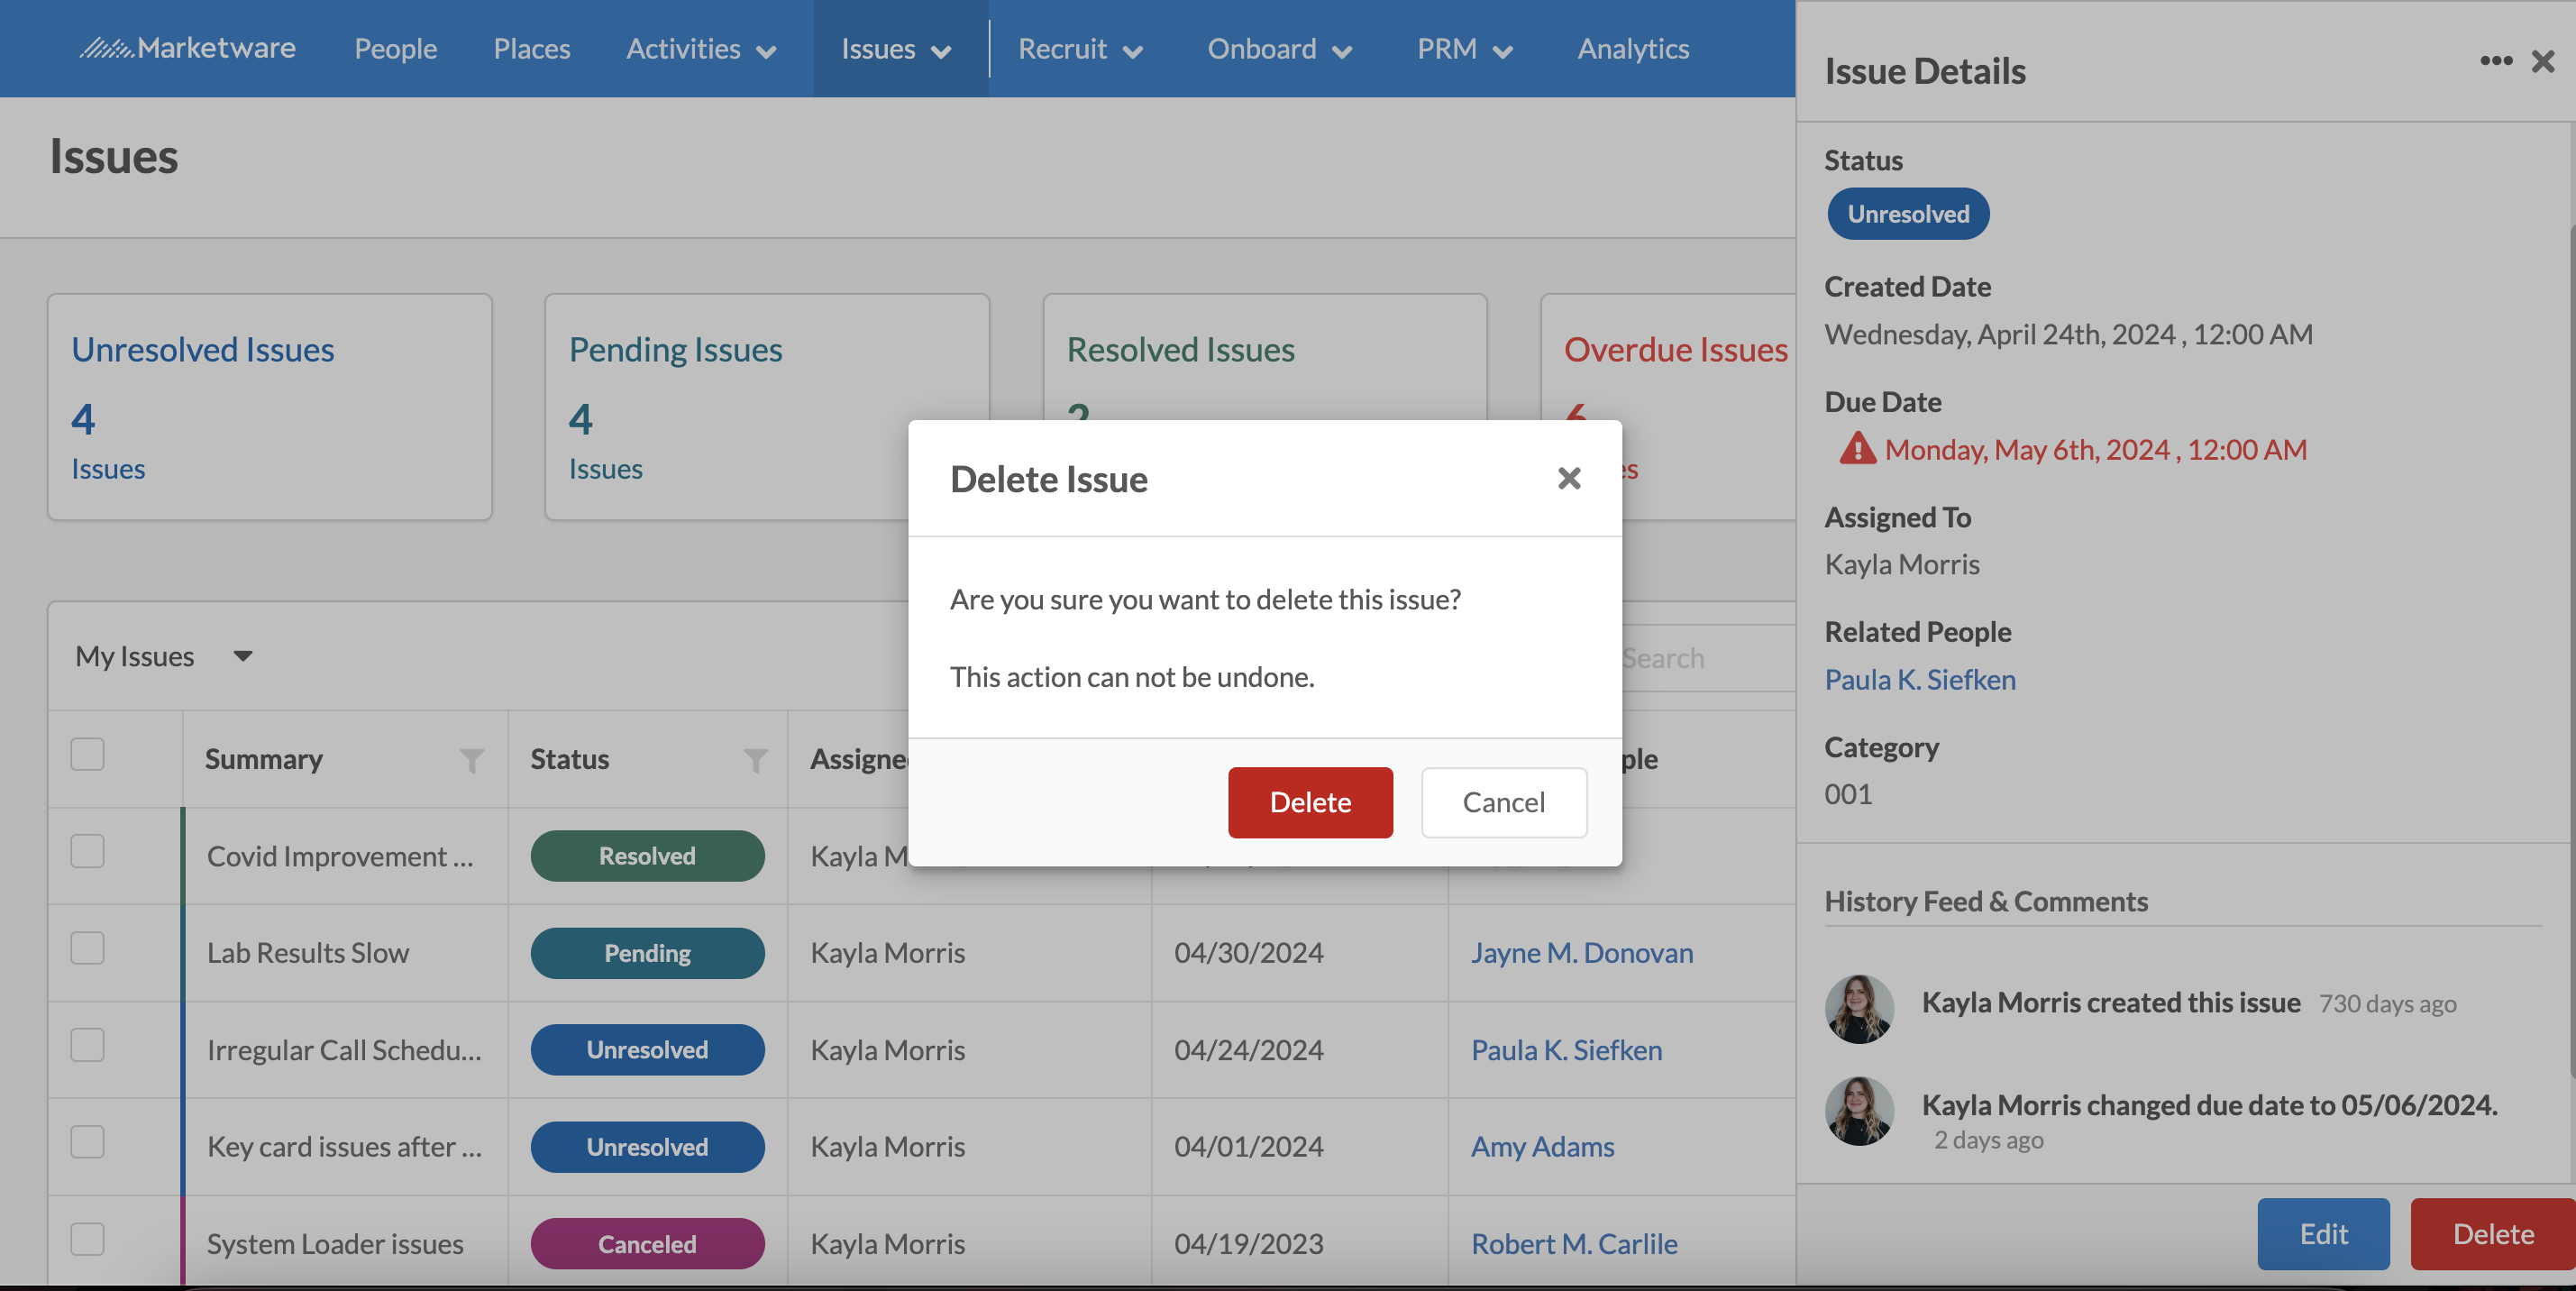
Delete an Issue
Deleting an issue can be done through the ellipses to the right of the issue or from the issue slide out. Click delete in the bottom right corner.
The system will ask if you are sure you want to delete an issue. Once an issue has been deleted it cannot be restored.