Intake Forms
Product Guide Library > Recruitment > Intake Forms
Use intake forms to gather candidate interest in a practice opportunity. This can serve as a provider interest form, or can be fully built out to act as an application form. Candidates who fill out the form will be added as profiles in Marketware, and will be added to the practice opportunity associated with the form.
Permissions & Restrictions
Permissions
Admins: Can add, edit & delete forms.
Full Users: Can add & edit forms.
Standard, Limited & Read-Only: Can view forms lists but cannot add, edit or delete forms.
Adding forms to practice opportunities is tied to edit rights for the opportunity itself.
Term Definitions
Elements: Fields to use for gathering information from a candidate for an intake or application – like name, email, phone number.
Intake Form: A form used to post on external websites to gather candidate interest in an open position or used to create a full application form.
Pre-Defined Fields: These are system fields that, when used in a form, will populate on the candidates person profile when they apply.
Section: A way to group fields into one part of the form
Restrictions or Pre-Requisites
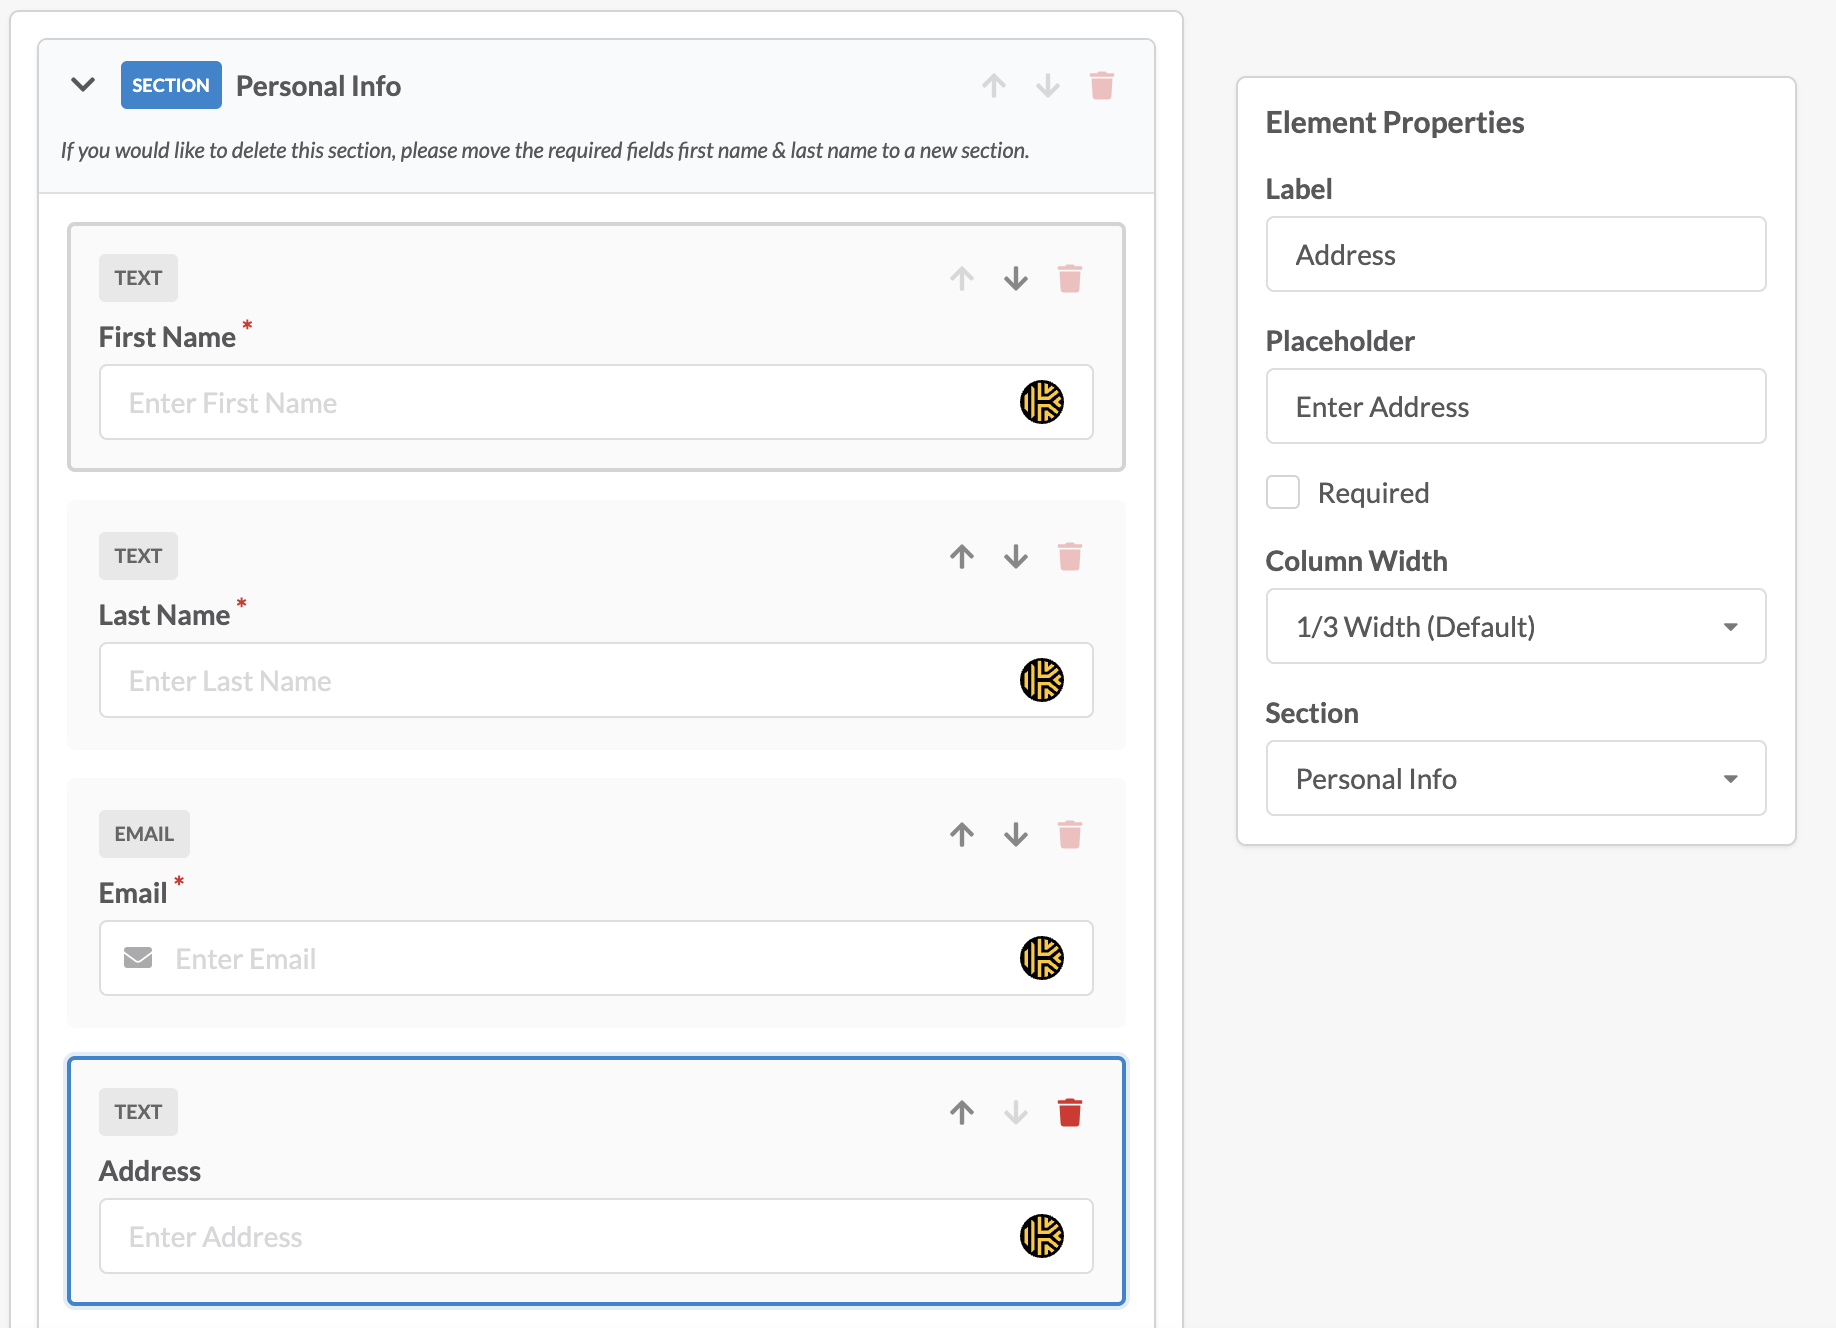
First name, last name & email are required fields for every form. These are used to create profiles for the candidate. They cannot be removed from the form but can be moved to other sections of the form.
A form has to be created first before it can be linked to a practice opportunity.
Accessing Intake Forms
Intake forms are created and maintained in the account settings. From the profile icon in the top right of the main navigation, click the profile picture. From the dropdown items, select Account Settings.
Under the Recruit section, click Intake Forms.
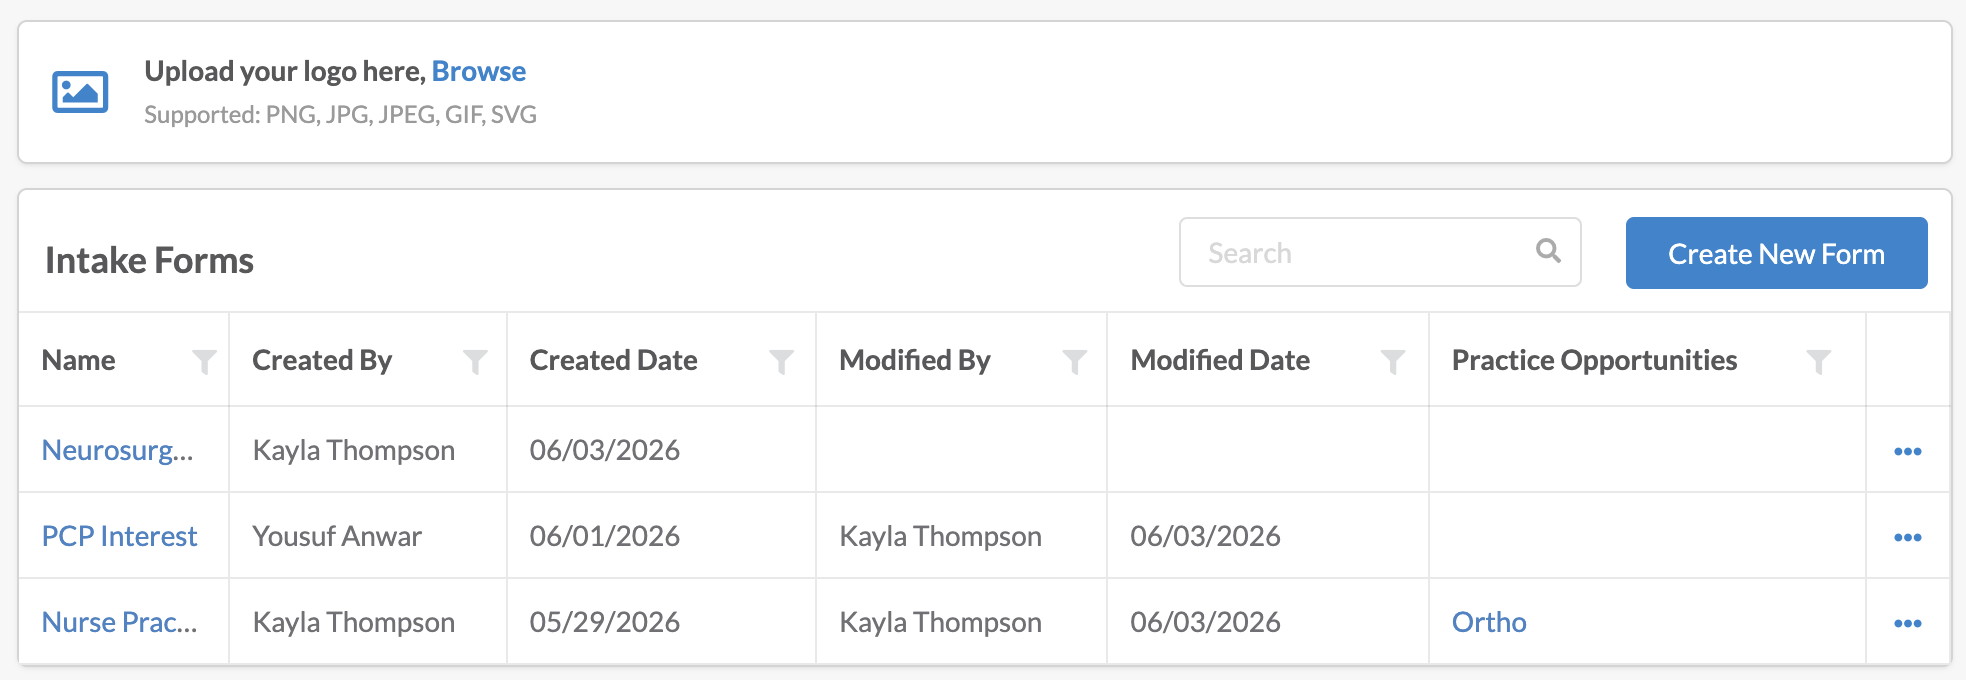
Created intake forms will show in a list grid & are searchable by name.

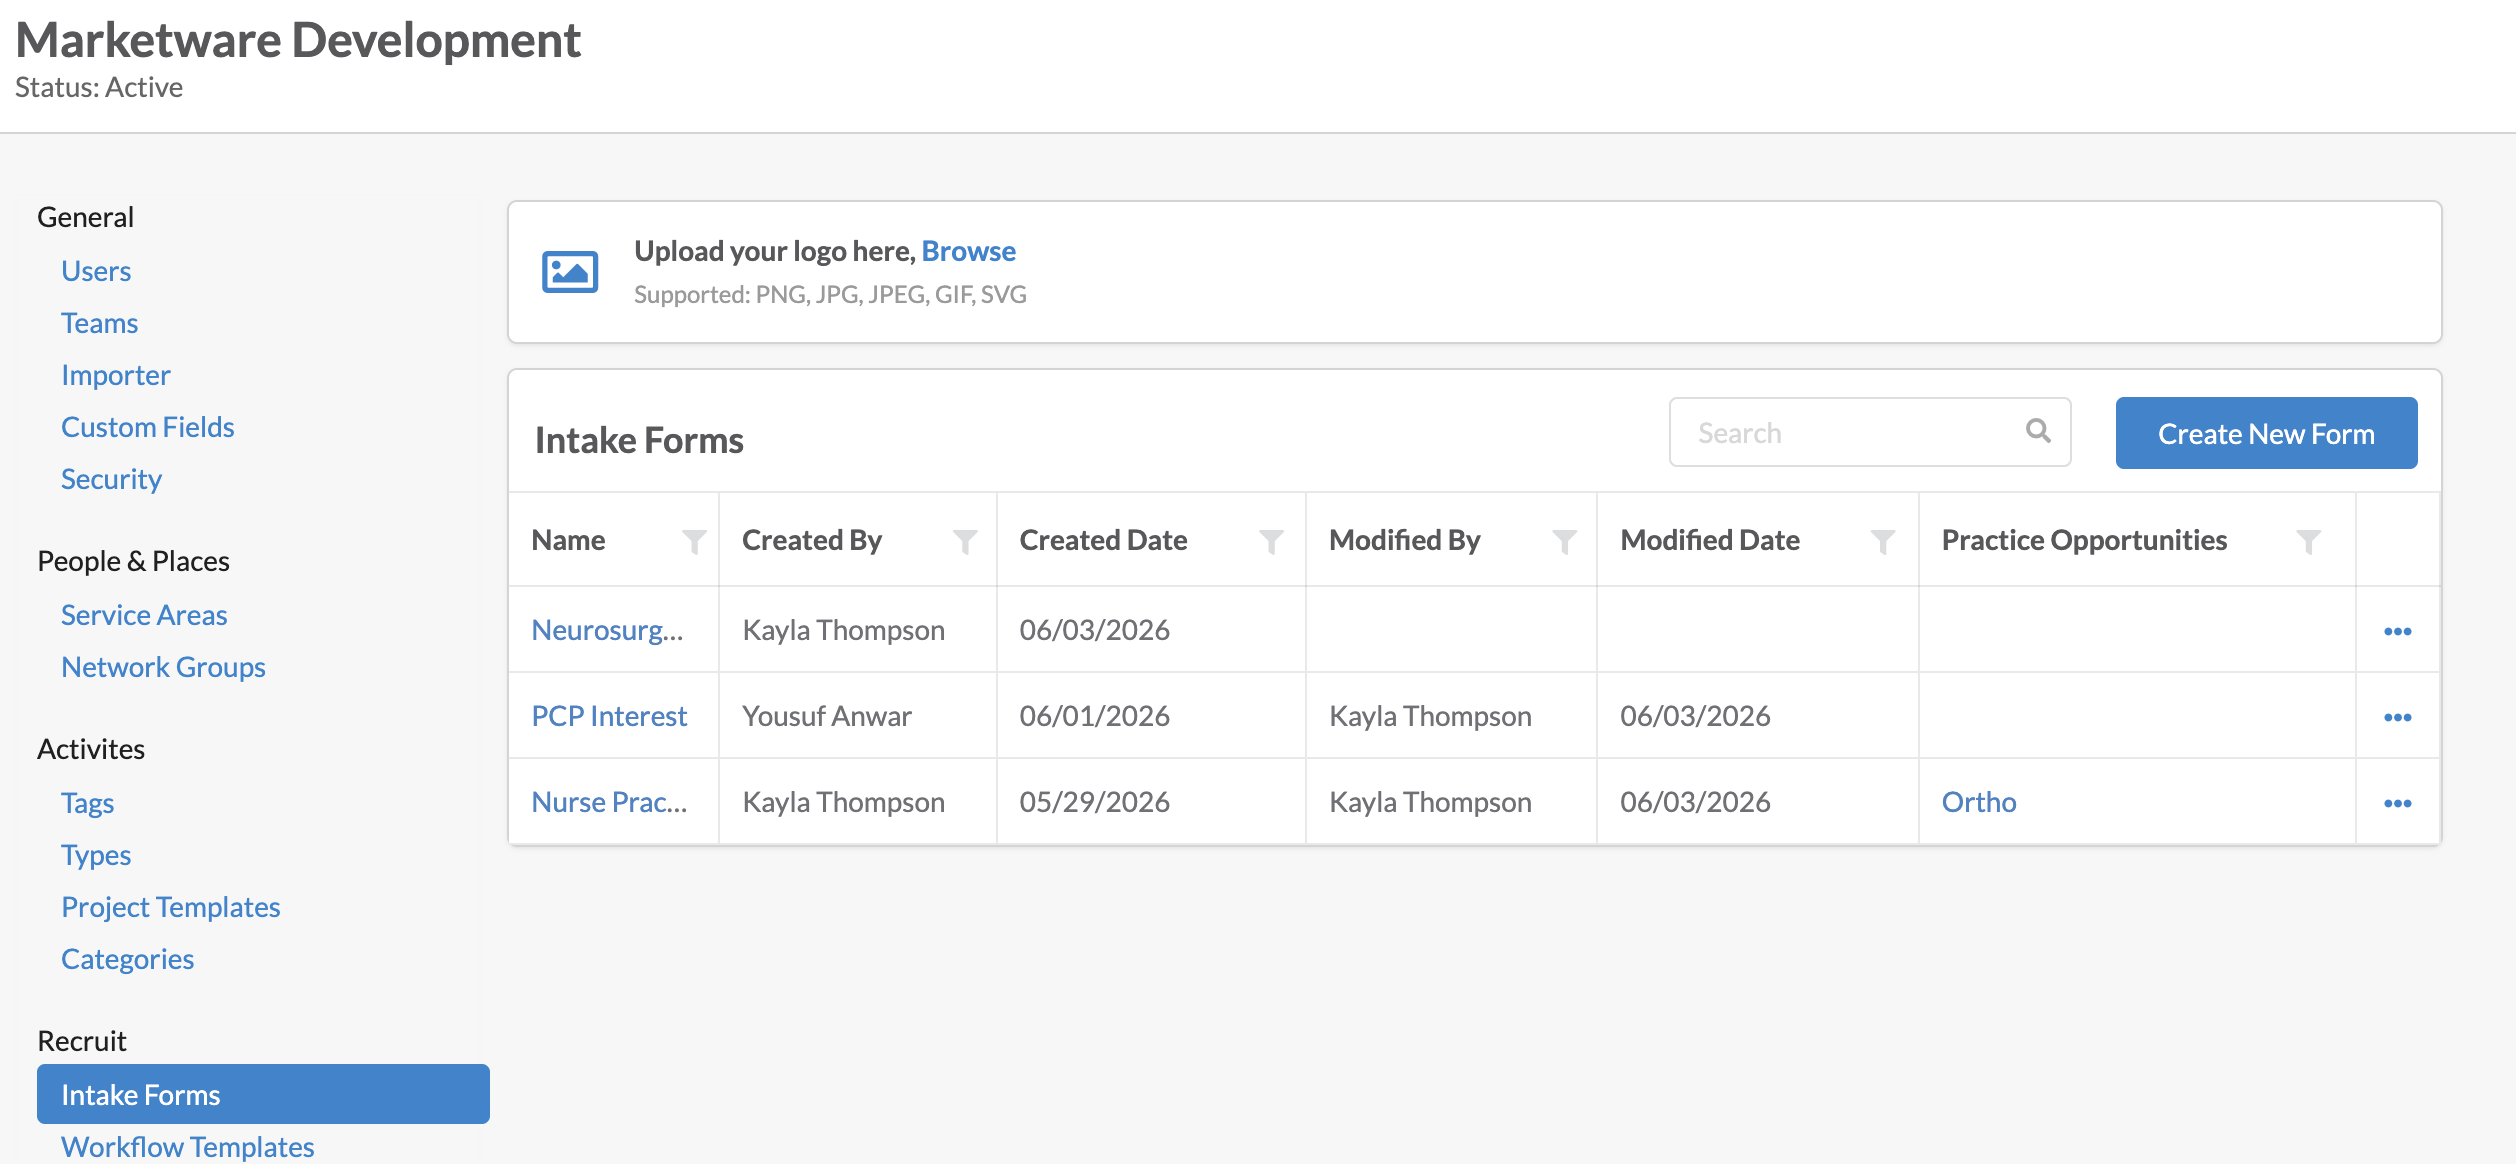
Adding Logo
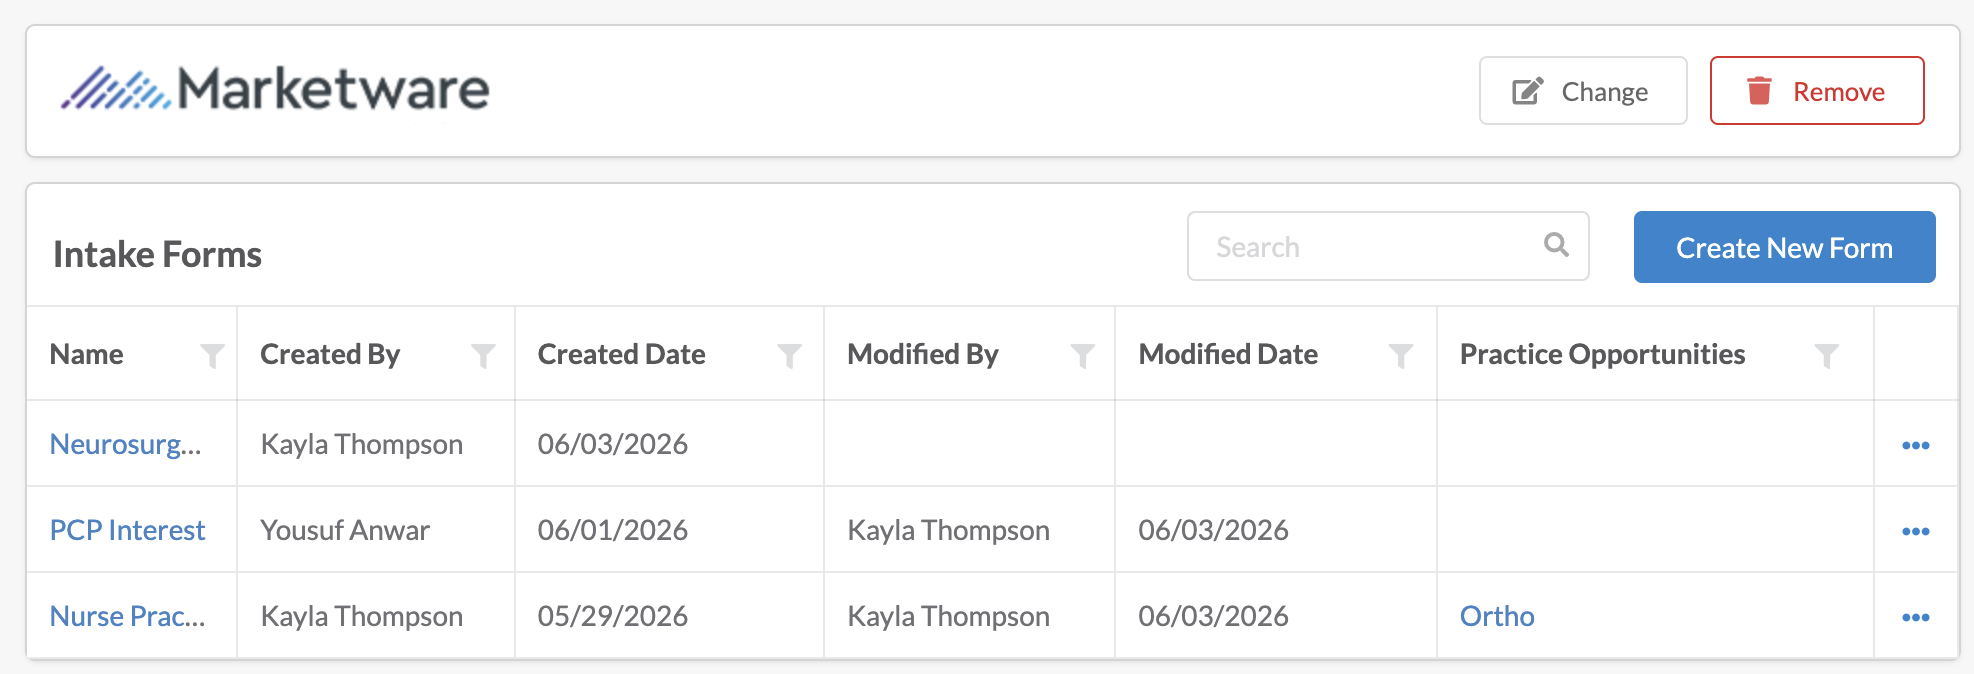
For a branded experience, a logo can be added in this section of the application so intake forms display as from your organization. Click on the Browse link and choose an image from files. Images cannot be larger than 20 MB. Once uploaded, this will be placed in every intake form created. There can only be 1 logo for the account. This logo is only used to brand the intake form – it will not create a branded experience for internal users in the Marketware application.
Logos can be changed by clicking the change button, which will prompt you to choose a new file. Logos can be removed which will delete the logo from all existing intake forms.
Creating an Intake Form
To add a new intake form, click Create New Form button on the forms list. A panel will open and a Name of the form will be required before being redirected to the form creation page.

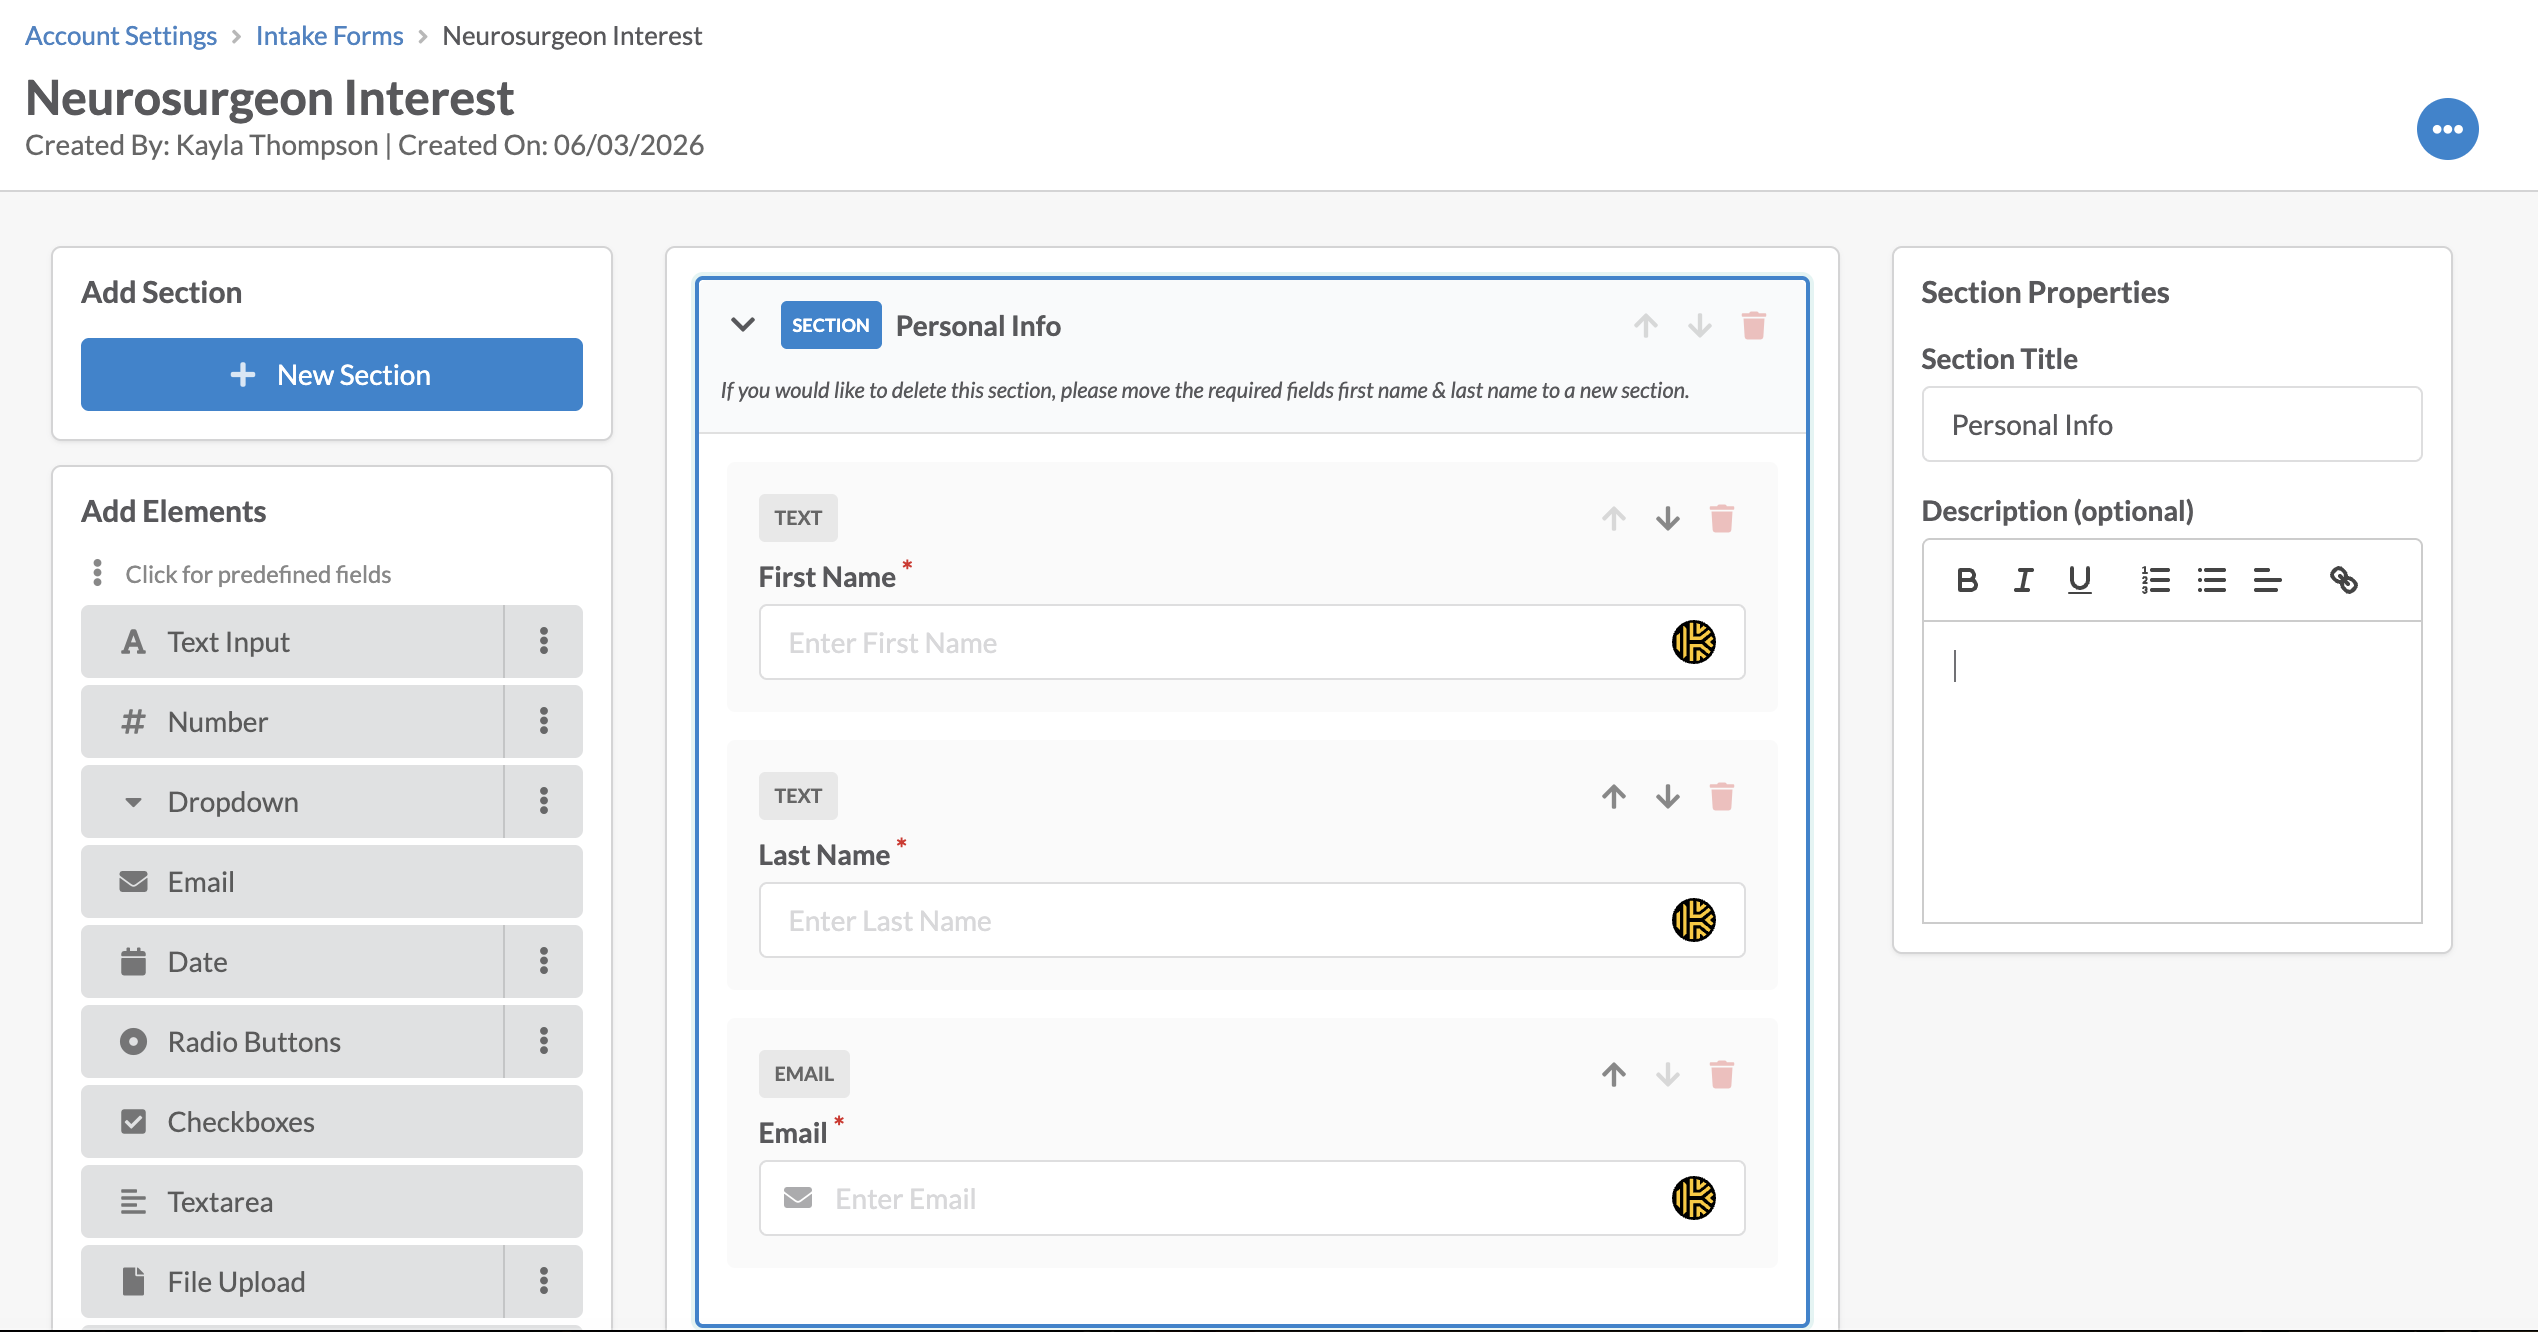
Add Sections
A section will be used to break a form into several ‘pages’ or groups. By default, 1 section will be created and this will include our required fields of First Name, Last Name & Email.
A form can have 1 section or can have multiple – there is not limit to sections that can created.
To add a new section, click Add Section button. The new section will be added to the bottom of the form. When previewed, this section will be on a next ‘page’.
A section requires a title. A description can be added to give context to the section. This description will display on the form under the title of the section.
If multiple sections are part of a form, they can be moved in order by using the up and down arrows. Sections can be deleted from the form by clicking delete. If a section is deleted, the fields in the section will also be removed.
Note* a section cannot be deleted if it has any 1 of 3 system required fields. These fields must be moved to a new section before the section can be deleted.
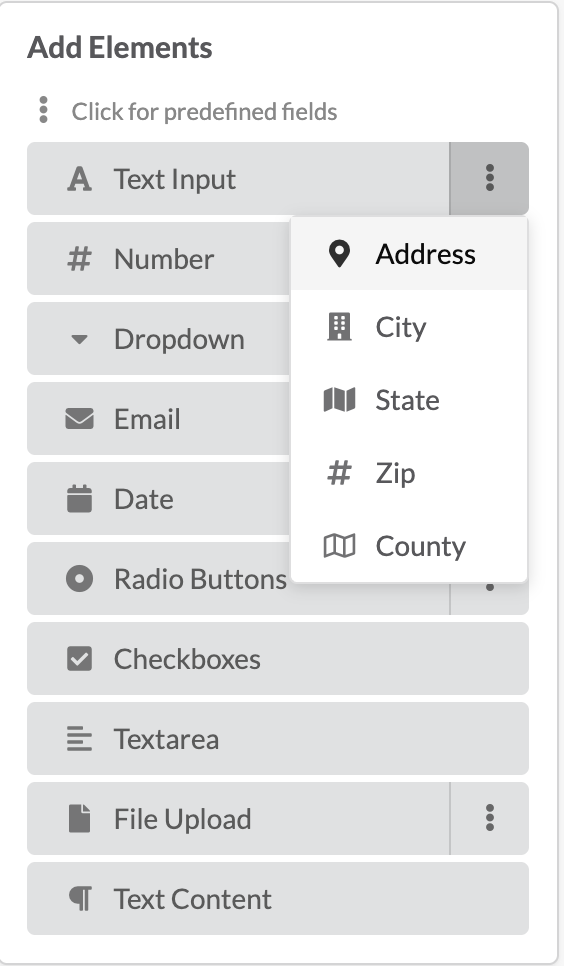
Add Elements
Elements are the fields that can be added to the intake form for a candidate to fill out. There are some system fields that are pre-defined that can be used, such as First Name, Last Name, Availability Date, etc. When these fields are part of a form, they will auto insert data into the candidate’s profile when it is created.
Custom fields can be created, such as drop downs, radio buttons, check boxes, etc. Because these are custom, they will be stored against a pdf export of the form that is uploaded to the candidate’s profile, but they will not tie directly to data on the profile itself.
When an element is added, it will get added to the section that is highlighted. Clicking the section will show a blue highlight which indicates this is the section being edited.
Elements, when added, can be given a label, a placeholder value, indication if it is a required field (by default this is unchecked), indication of how much of the form this element should take 1/3 to full width, and which section the element should be part.
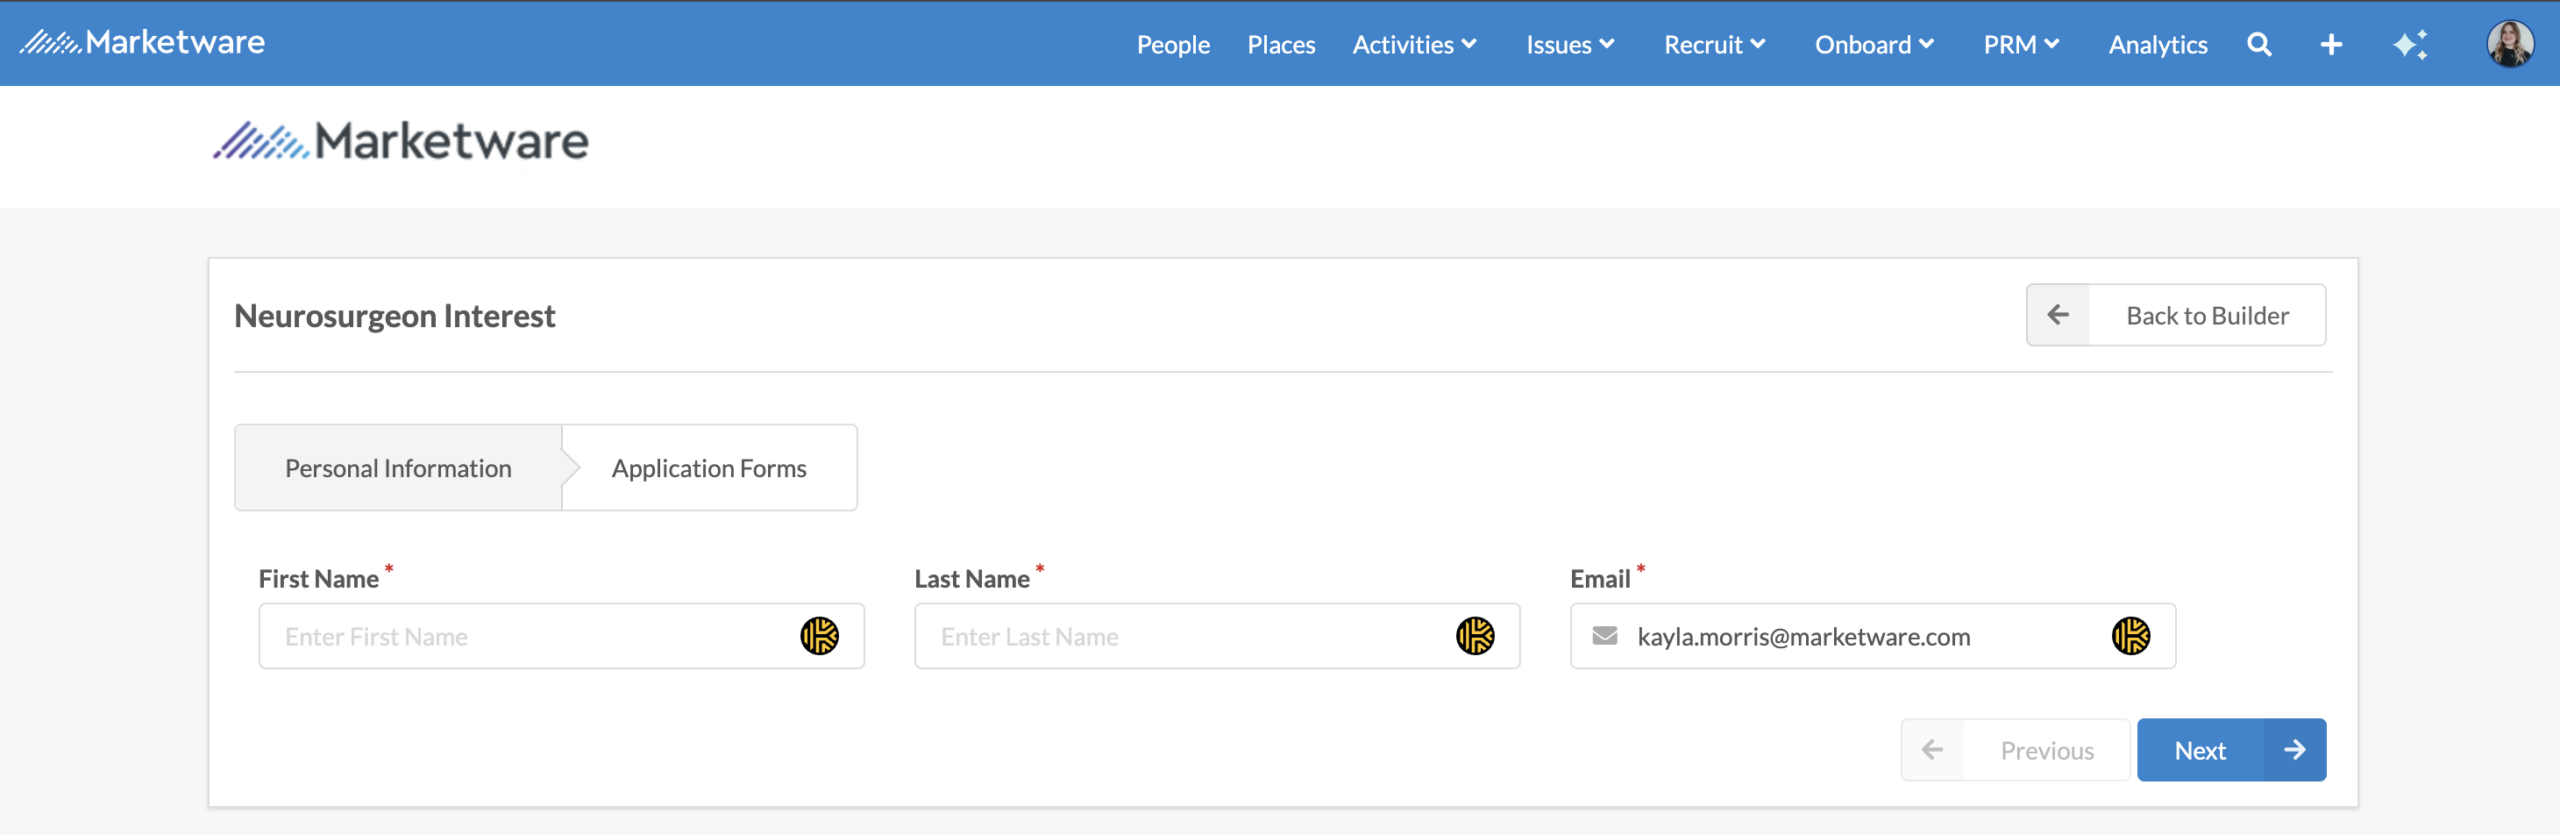
Preview
To preview the what the intake form will look like on the candidate facing side, click the preview form.
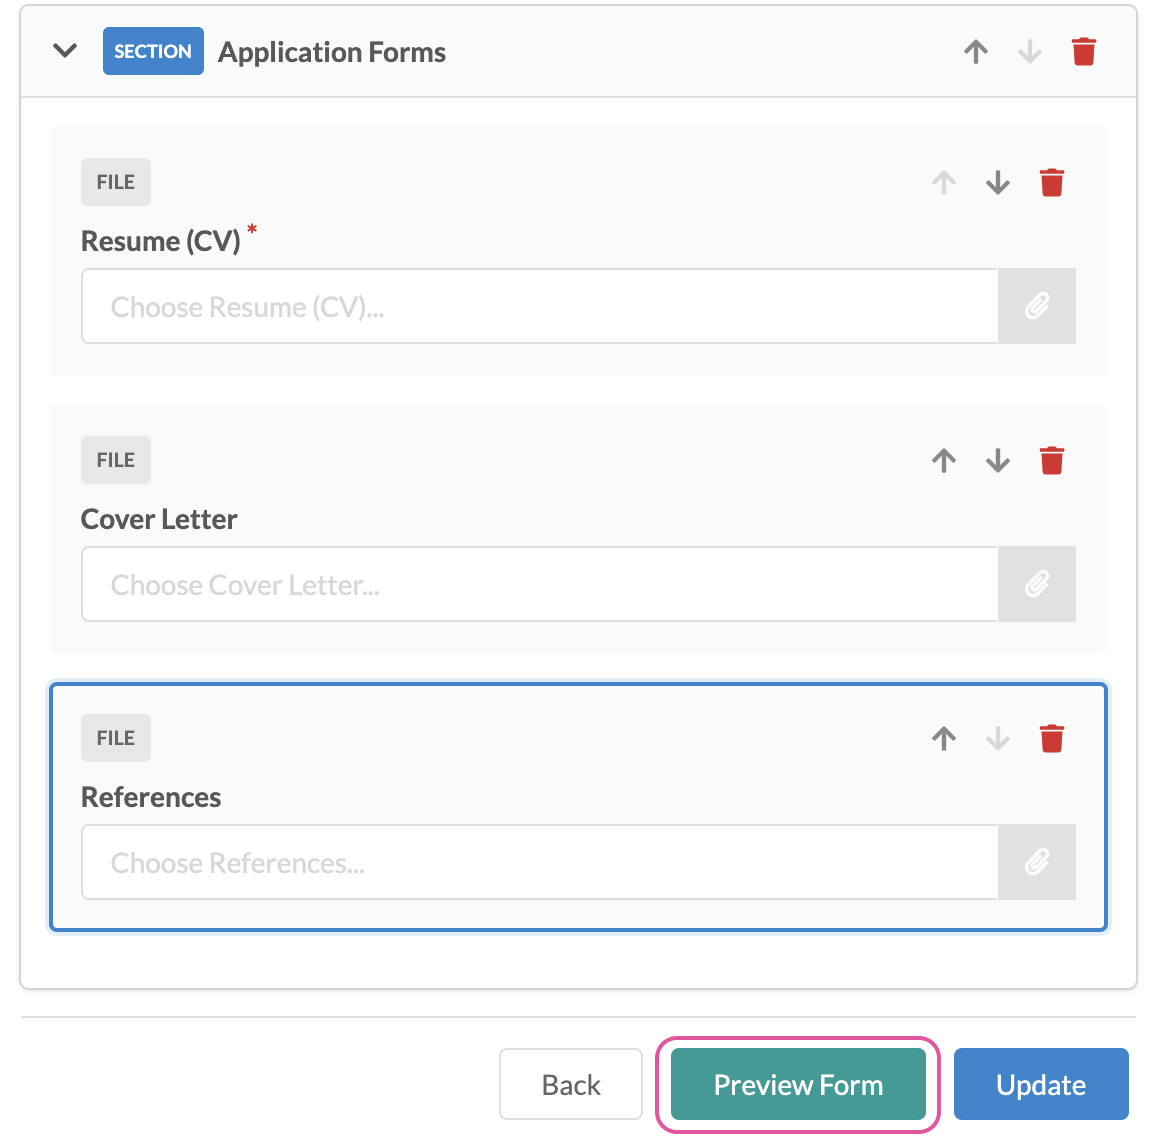
This will open the details view of the form – each section can be reviewed by clicking the section header or clicking next. Go back to editing the form by clicking the back to builder button.
Editing an Intake Form
Both Admins & Full users have the rights to edit intake forms. Editing can be managed by clicking the name of the form from the intake form list, or from the ellipses next to the form name.
Editing the name of the intake form can be done from the ellipses header within the intake form.


Good to know!
- Edits are not automatically saved. Ensure changes are saved by clicking update form before closing the form.
- Modification dates are stored, but a history of changes is not logged.
- Any forms actively linked to practice opportunities, will automatically get the updates.
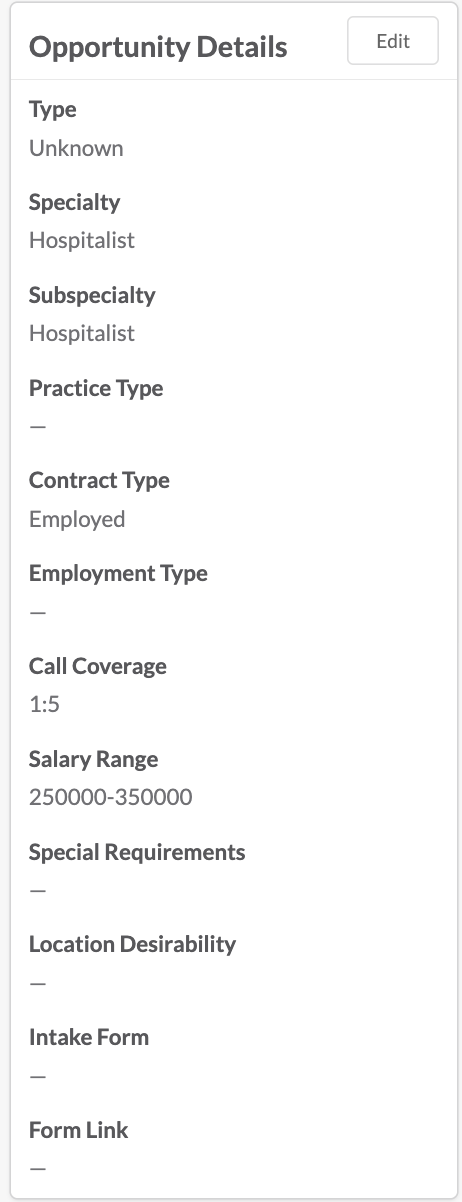
Tying Intake form to Practice Opportunity
To get a sharable link for the intake form, it must be tied to a practice opportunity. An intake form can be tied to 1 or more practice opportunities – unique links are created for each PO so when candidates apply through a given link, they are associated to the respective opportunity.
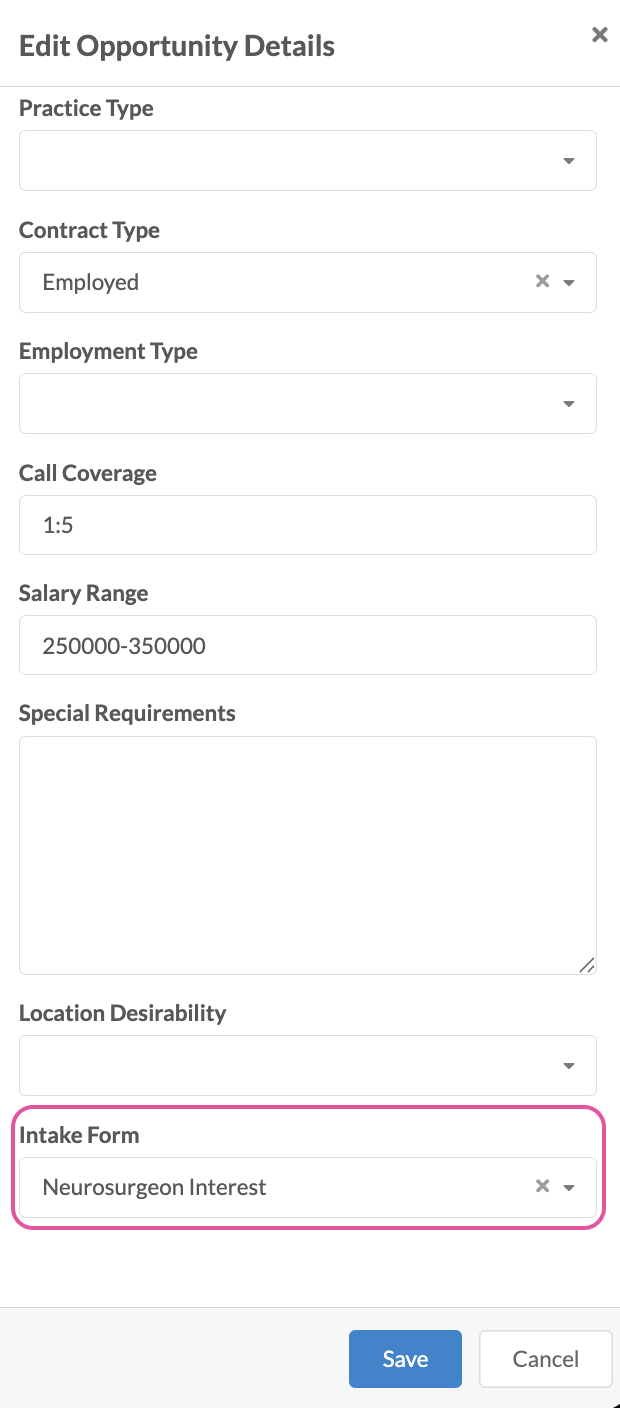
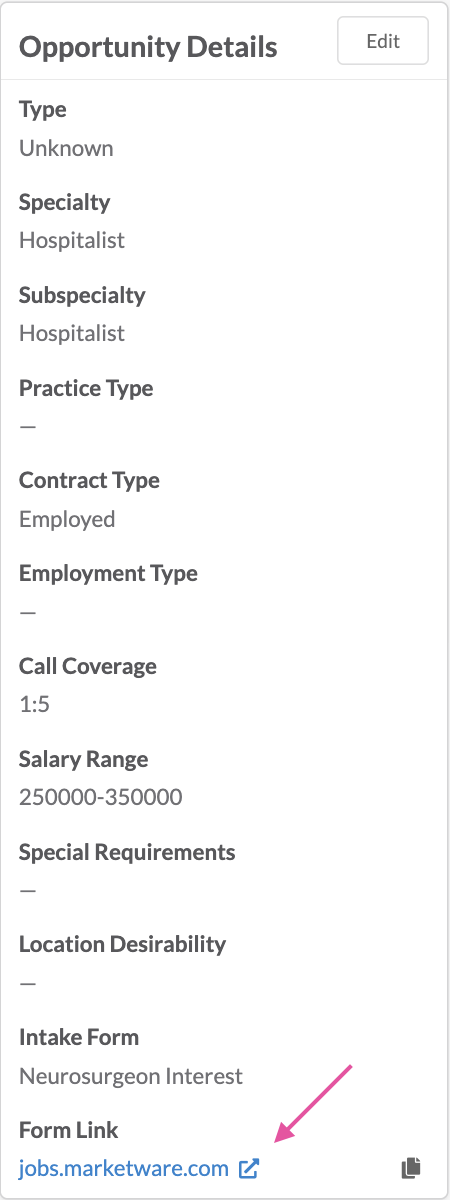
From the opportunity landing page, navigate to the Practice Opp Details card. Click edit. At the bottom of the edit panel, select the intake form to be used. On saving the details, the panel will close and the form link will be automatically generated. The form can be opened in a new tab by clicking the link or can be copied to your clipboard by clicking the copy icon. Use this link to post to various job boards to get candidates for this opportunity.
Viewing Candidates who were created through Intake Form
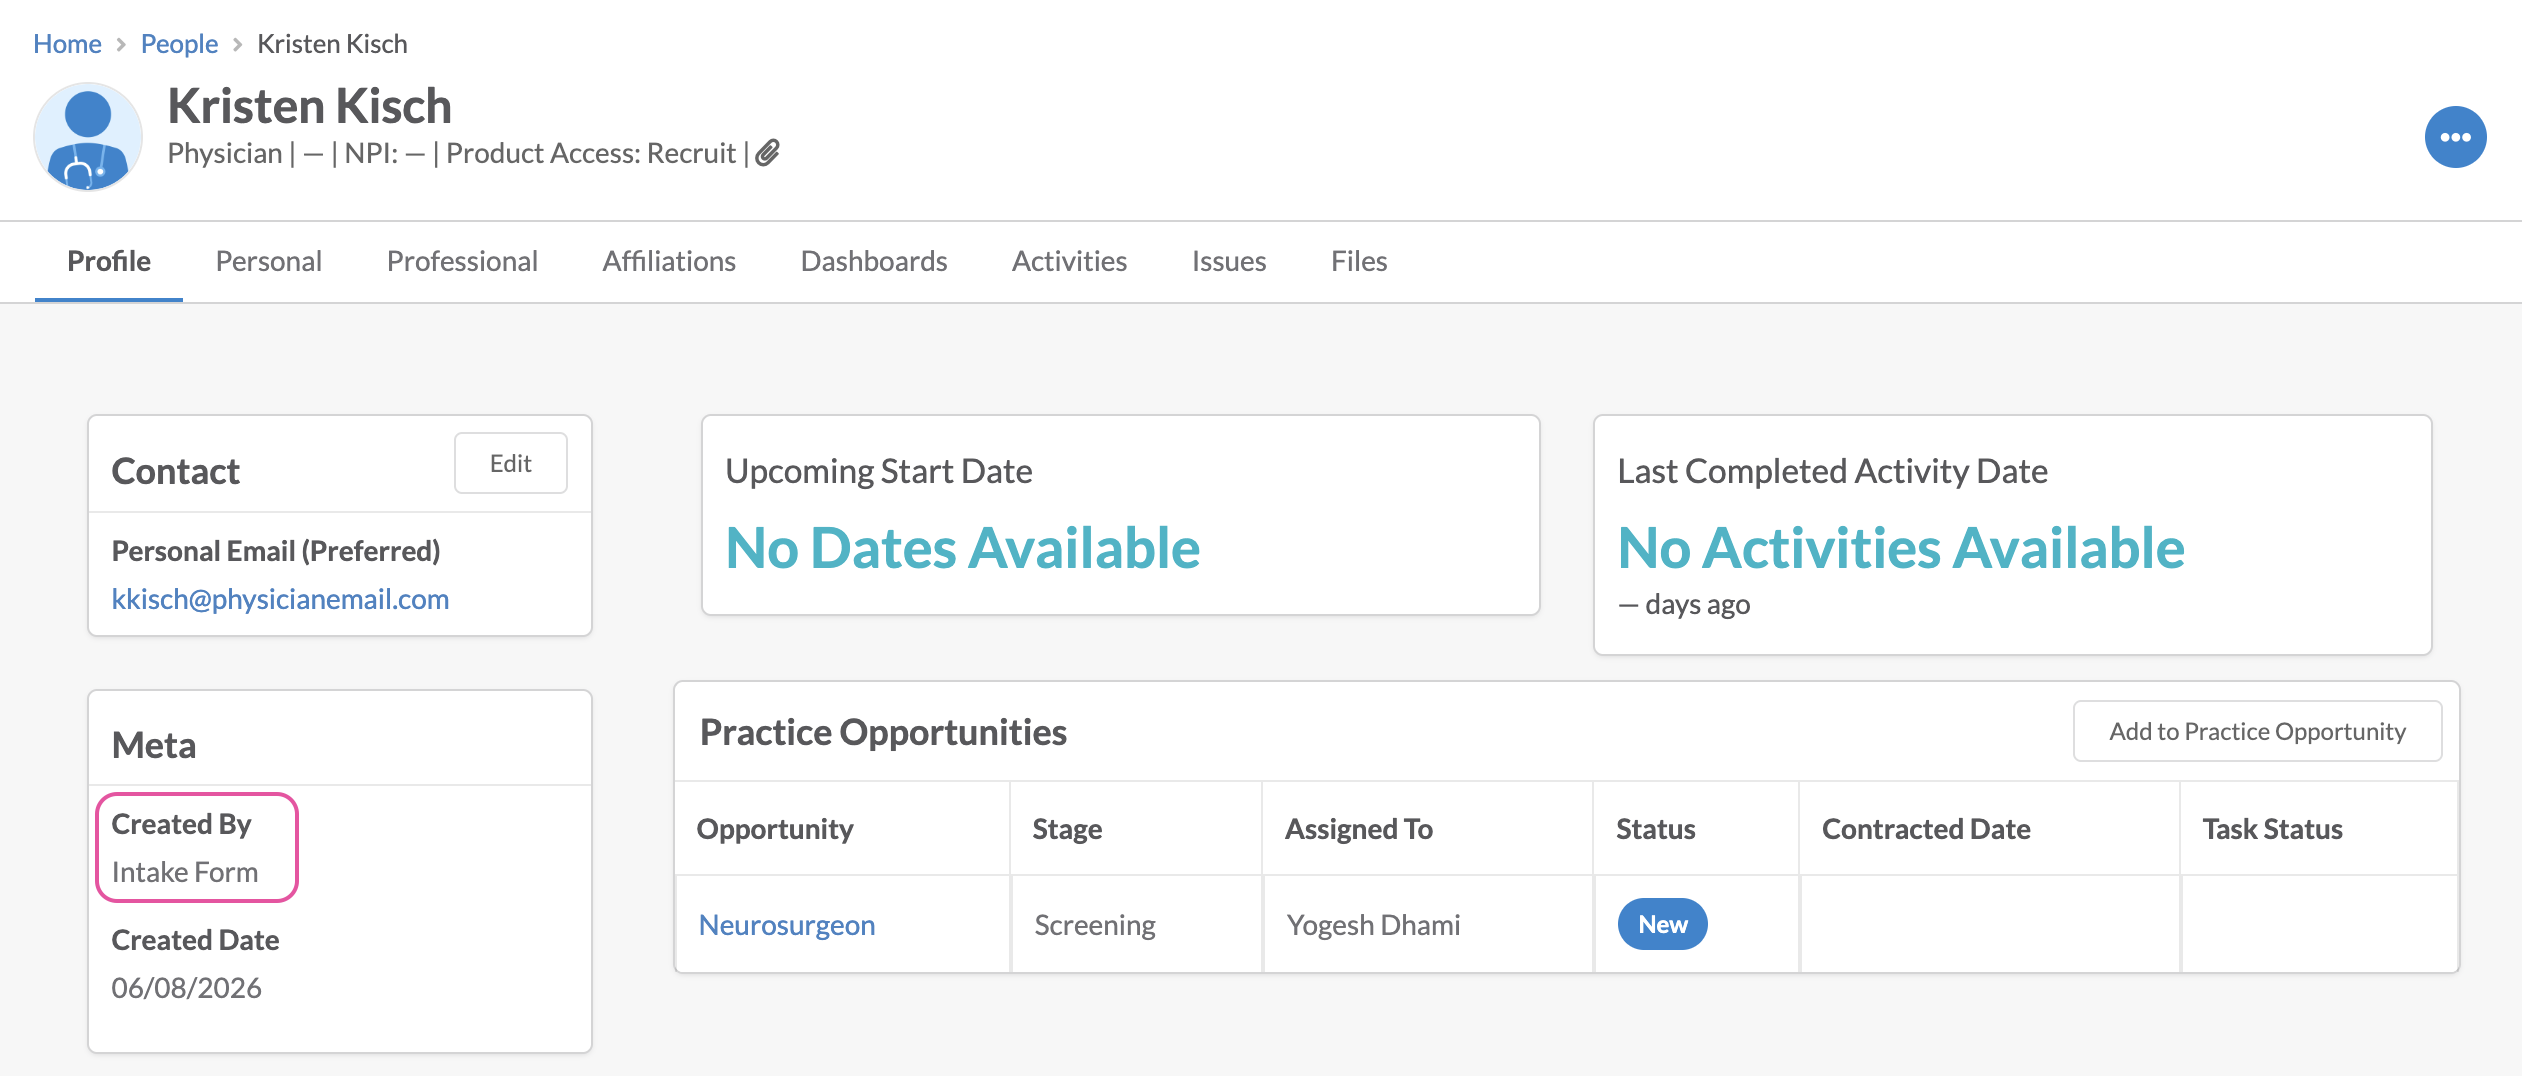
Once a candidate or lead submits an intake or application form, a new person profile will be created for the candidate in Marketware and they will be dropped into the first stage of the opportunity tied to the form they filled out.
Unique profiles are created based on a unique email – if a candidate applies to more than one form, only 1 profile will be created for them and they will be added to multiple opportunities as new candidates in each opportunity.
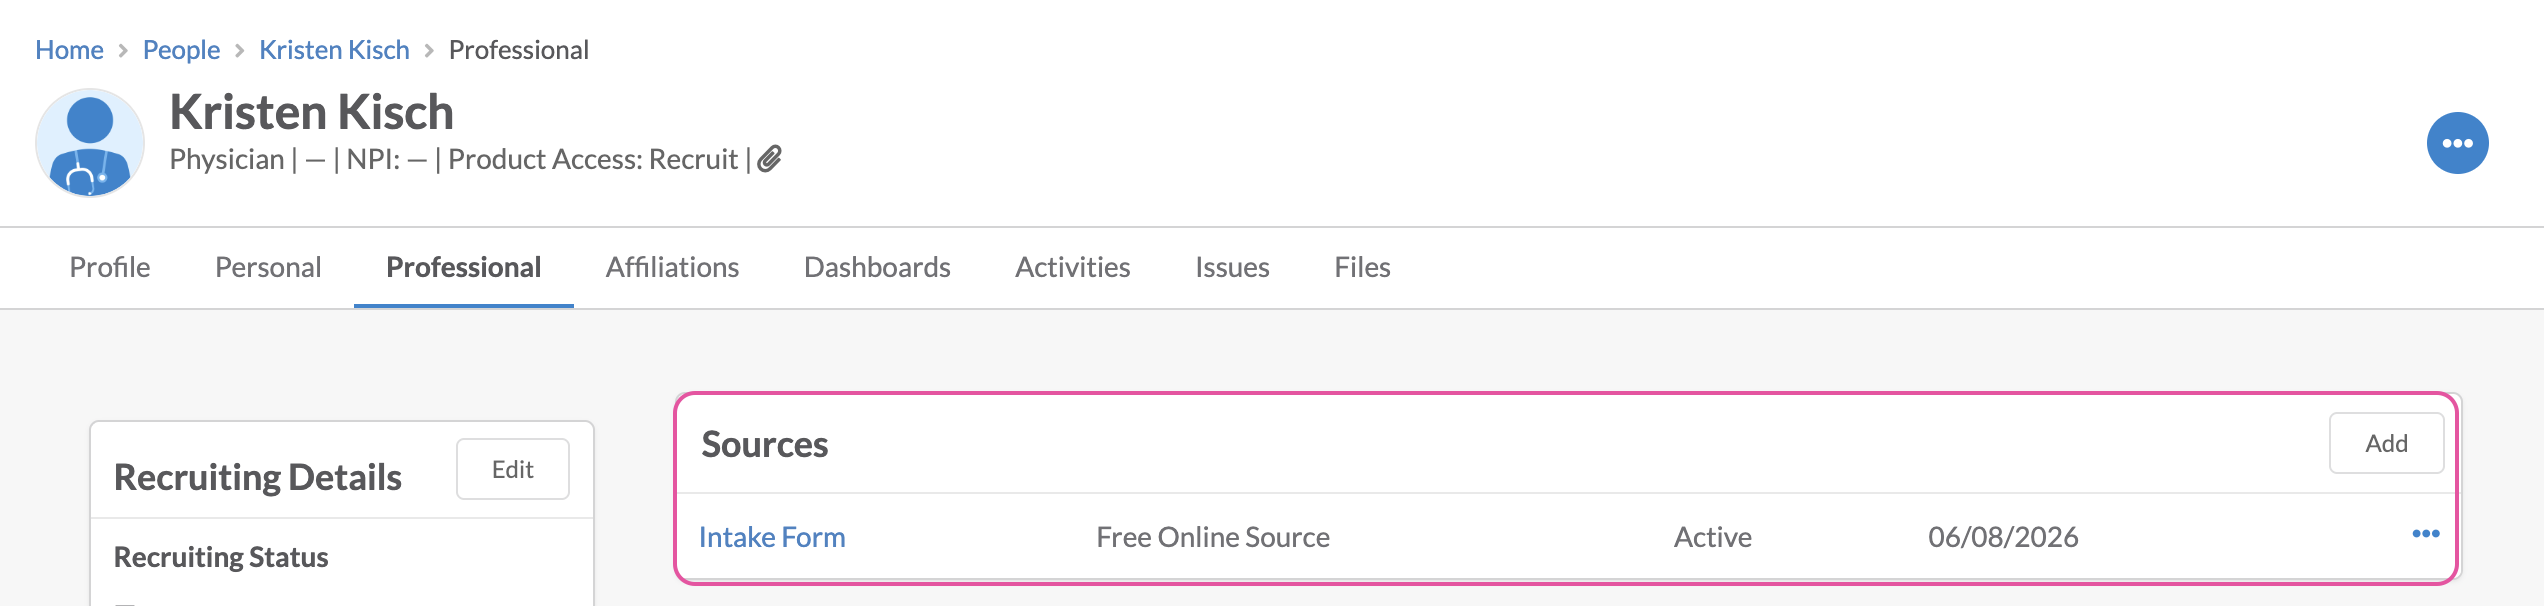
Profiles created through the intake form will be indicated by the created by: Intake Form & they will have a source tied to them titled, Intake Form.
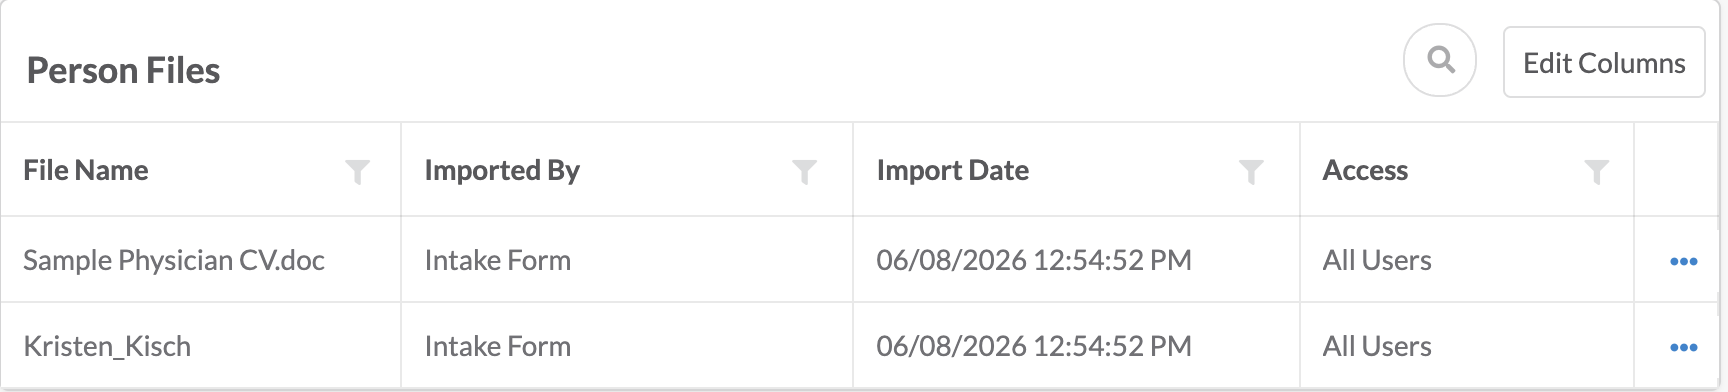
A PDF of the intake form will be uploaded to the person’s profile. Any other forms uploaded through the intake form, such as CV or Cover Letter, will also be uploaded to the files section.
Good to Know!
- CVs will not be automatically parsed when the profile is created.
- Custom created fields in the intake form will not tie to custom fields created in the application. Use system default fields to fill the profile out – such as contact information, demographics, etc.
Product Guide Library

